
VST Plugins (96)
The Ultimate Guide to Free VST Plugins in 2025
Written by Sounds Space
🎛️ Top 20 Free VST Plugins for Music Producers (2025–2026)
🎹 Virtual Instruments & Synths
-
Vital (Free Version) – Pro-level wavetable synth with drag-and-drop modulation and deep sound design.
-
Surge XT – Open-source hybrid synth with tons of presets and modulation options.
-
Spitfire Audio LABS – Free high-quality sampled instruments (strings, pianos, textures) updated monthly.
-
Dexed – Classic Yamaha DX7 FM synth emulation for retro and 80s sounds.
-
Grand Piano by Audiolatry – True, detailed sampled grand piano with built-in effects.
-
MOK Miniraze – Minimal yet character-driven digital synth for crunchy lo-fi leads.
-
Full Bucket Music Fury-68 – Vintage-inspired analog synth sound.
🎚️ Effects, Mixing & Utility Plugins
-
Valhalla Supermassive – Huge ambient reverb & delay effects (legendary and free).
-
TDR Nova – Dynamic EQ + compressor perfect for mixing and mastering.
-
Kilohearts Essentials – Bundle of 30+ FX including EQ, chorus, flanger & more.
-
Pancake 2 (Cableguys) – Creative stereo panning modulator.
-
Analog Obsession MythPre – Preamp-style harmonic saturation.
-
Drox II (Dystopian Waves) – Glitch/stutter effects generator.
-
HEAR360 EcoSlap – Punchy slap delay with character.
-
ToneLib TL BaxEQ – Smooth shelving EQ with classic vibe.
🥁 Creative & Special Tools
-
Soundtoys SpaceBlender (Free promo) – Experimental reverb space (limited time free).
-
Safari Pedals Planet of the Cubs – Lo-fi modulation + space textures.
-
Codec v2.0 (Lese) – Glitchy bitrate and sample-rate artifact effects.
-
Valhalla Supermassive — yes, we list it again because of how essential it is for atmospheric sound design.
-
Slate Digital VMR (Revival & The Monster) – Free modules from Virtual Mix Rack (sometimes available through promos) — great for warmth & compression.
🎙️ The Ultimate Guide to Free VST Plugins in 2025
Title: Unlock Your Best Mix: The 20 Essential Free VST Plugins Every Producer Needs in 2025
🎧 Introduction
In today’s music production world, you don’t need expensive plugins to make pro-level tracks — thanks to an amazing wave of free VST instruments and effects. Whether you’re making electronic, hip-hop, lo-fi, cinematic, or rock music, there are free tools that rival paid gear and help you sound bigger, cleaner, and more creative. In this blog, we’ve curated the top 20 free VST plugins of 2025 — all genuinely free, regularly updated, and widely loved by producers.
🎹 1. Vital (Free Version) – The Wavetable Weapon
Vital is arguably the most powerful free synthesizer on the planet. Its modern wavetable engine lets you warp, morph, and sculpt sound effortlessly. It includes rich presets, spectral visual feedback, and deep modulation routing — features usually only found in premium synths. Producers use Vital for everything from banging basslines to evolving pads and shimmering leads.
🔥 2. Surge XT – Open-Source Sonic Flexibility
If Vital is the engine, Surge XT is the whole racecar. Surge XT is a community-driven synth that combines wavetable, FM, and subtractive synthesis — giving you an extremely wide sonic palette. It’s ideal for EDM, experimental music, and forward-thinking sound design.
🎻 3. Spitfire Audio LABS – Premium Sound for Zero Dollars
LABS is like getting a professional sample library subscription for free. With regular updates, LABS includes expressive pianos, strings, atmospheric textures, drums, and more. Its instruments sound organic and rich — perfect for cinematic composition, lo-fi tracks, or lush background layers.
🎹 4. Dexed – Classic FM Power
Want sounds straight out of the 80s? Dexed emulates the legendary Yamaha DX7 and lets you load original DX7 patches. Its metallic bells, electric pianos, and classic FM timbres bring vintage character to modern productions.
🎼 5. Grand Piano by Audiolatry – Real Piano, Real Feel
Sampling isn’t dead — and Grand Piano proves it. With 16 velocity layers and built-in effects, this piano plugin delivers a natural playing experience without costing a cent. Whether you’re scoring or adding a rich chord progression, it’s a must-download.
💥 6. MOK Miniraze – Lo-Fi Synth Character
Miniraze is not the most complex synth — but what it lacks in complexity, it makes up for in character. Its bit-reduced timbres and simple modulation give your tracks that vintage, gritty edge that modern clean synths often lack.
🌀 7. Full Bucket Music Fury-68 – Vintage Analog Vibes
Inspired by analog hardware from the late ’70s and early ’80s, Fury-68 provides warm oscillators and classic filters. It’s perfect for analog-leaning pads, soft leads, and mellow basses — especially in genres like synthwave or ambient.
🪐 8. Valhalla Supermassive – Cinematic Reverbs & Delays
Valhalla Supermassive remains one of the most beloved free FX plugins ever made. Its lush reverbs and endless delays create atmospheric spaces that transform static tracks into immersive soundscapes — ideal for ambient, soundtrack, and dream pop productions.
🎚️ 9. TDR Nova – Dynamic EQ for Precision Mixing
Mastering engineers often use dynamic equalization to tame harsh frequencies without dulling life in a mix. TDR Nova gives you that power for free — combining EQ, compression, and dynamic shaping in one.
🎛️ 10. Kilohearts Essentials – A Swiss Army Knife of FX
This bundle packs over 30 effects into one free suite, including EQ, flanger, chorus, compressor, and more. You can chain these creatively for complex sound design or use them individually for simple fixes.
🔊 11. Pancake 2 – Creative Stereo Motion
Cableguys’ Pancake 2 is a stereo panning innovation. Use its drawable LFO curves to move audio across the stereo field rhythmically — a powerful tool for mixing and special FX.
🔥 12. Analog Obsession MythPre – Harmonic Warmth
Want analog warmth without spending money? MythPre adds subtle harmonics and presence to tracks. It’s especially great in ensembles where a hint of analog glue makes everything pop.
💥 13. Drox II – Glitch & Stutter Creativity
For adventurous producers, Drox II chops, fragments, and transforms sounds in unpredictable ways. It’s a perfect tool for electronic, glitch, experimental, or avant-garde production.
⏱️ 14. HEAR360 EcoSlap – Punchy Delay + Space
EcoSlap blends slapback delay with plate-style ambience. Use it on vocals, guitars, or synths to give them a punchy yet atmospheric space in the mix.
🎚️ 15. ToneLib TL BaxEQ – Smooth Tonal Control
A great shelving EQ with classic sound — perfect for shaping highs and lows with musical curves and low CPU usage.
🌀 16–20. Extras Worth Exploring
-
Soundtoys SpaceBlender – experimental reverb space (promo free).
-
Safari Pedals Planet of the Cubs – lo-fi modulation and textures.
-
Codec v2.0 (Lese) – glitchy bitrate artifact effect.
-
Slate Digital VMR Modules – occasional promo modules like Revival & Monster.
🎵 Conclusion: Tools Without Limits
Remember — the world of free music production tools has never been richer. Whether you’re on a budget or just love exploring sonic tools, these plugins will elevate your productions without costing a dime. From synths and pianos to cutting-edge effects and dynamic mixing tools, there’s something here for every musical genre and workflow.
Ready to download? Start with Vital, LABS, Supermassive, and TDR Nova — and build your free plugin arsenal from there.
Got a favorite free VST we missed? Let us know — We're always digging up hidden gems. 🎹🔥
FL Studio Goes Completely Web Browser Mode: The Future of Music Production Has Arrived
Written by Sounds Space
FL Studio Goes Completely Web Browser Mode: The Future of Music Production Has Arrived
For decades, music production has been tied to one simple idea: powerful software installed on powerful computers. If you wanted to produce at a professional level, you needed a fast machine, a licensed DAW, plugins installed locally, and hours spent configuring everything before creativity even began.
But in 2025, that model is being challenged — hard.
The idea of FL Studio running entirely in a web browser is no longer science fiction or marketing hype. It represents a fundamental shift in how music is created, shared, and monetized. And whether you’re an FL Studio veteran or a curious producer watching from the sidelines, one thing is clear:
👉 Music production is moving to the cloud.
This article breaks down what it really means for FL Studio to go full web-based, why it matters, what producers gain (and lose), and how this move could reshape the entire music industry.
From Desktop DAW to Browser-Based Studio
FL Studio has always been known for pushing boundaries. From its early days as FruityLoops to becoming one of the most widely used DAWs in the world, it has consistently attracted producers who value speed, creativity, and accessibility.
But a browser-based FL Studio takes that philosophy to a whole new level.
Instead of downloading and installing a massive application, producers would:
-
Open a browser
-
Log in to an account
-
Start producing instantly
No installations. No system limitations. No waiting.
This mirrors what we’ve already seen in other creative industries — design tools, video editors, even game engines — all moving into the browser. Music production was simply the next frontier.
Why This Shift Is Happening Now
The timing isn’t random.
Several technological trends have aligned to make browser-based DAWs not just possible, but practical:
1. Cloud Computing Has Matured
Servers today are powerful enough to handle real-time audio processing, rendering, and collaboration. Latency, once the biggest enemy of cloud audio, is being aggressively optimized.
2. Web Audio Technology Has Evolved
Modern browsers now support advanced Web Audio APIs that allow:
-
Real-time synthesis
-
MIDI input
-
Low-latency playback
-
Complex signal routing
What was once limited to basic audio playback can now support near-DAW-level functionality.
3. Producers Want Flexibility
Today’s producers aren’t tied to one location. They work:
-
On laptops
-
On shared machines
-
On different operating systems
-
On the move
A browser-based FL Studio means your studio follows you everywhere.
What “Completely Web Browser Mode” Really Means
This isn’t about a “lite” demo version.
A full browser-based FL Studio would likely include:
-
A cloud-hosted DAW engine
-
Real-time audio processing on servers
-
Project files stored securely online
-
Plugin-like instruments built into the platform
-
Cross-device project access
In simple terms: FL Studio becomes a service, not just software.
The Biggest Advantages for Producers
Let’s be honest — if this didn’t offer major benefits, it wouldn’t be happening. Here’s why producers are paying attention.
1. Produce Anywhere, Instantly
No installation means:
-
No waiting
-
No compatibility issues
-
No hardware restrictions
You could start a beat on:
-
A café laptop
-
A school computer
-
A borrowed device
-
Even a tablet (eventually)
Your studio is just a login away.
2. Cross-Platform Freedom
Mac. Windows. Linux. ChromeOS.
A browser-based FL Studio kills platform wars instantly. If your browser runs, your DAW runs.
This alone could dramatically expand FL Studio’s global user base.
3. Seamless Collaboration
Collaboration is where web-based DAWs truly shine.
Imagine:
-
Two producers working on the same project in real time
-
Changes syncing instantly
-
No exporting stems
-
No “send me the latest version” messages
Music creation becomes closer to how Google Docs works — shared, live, and fluid.
4. Automatic Updates, Zero Hassle
No more:
-
Manual updates
-
Plugin version conflicts
-
Broken installs
Everything updates server-side. Every user always has the latest version — instantly.
5. Lower Barrier for New Producers
For beginners, installing a DAW can feel overwhelming.
A browser-based FL Studio removes friction:
-
Try before committing
-
Learn instantly
-
No expensive hardware required
This opens the door for millions of new creators worldwide.
The Role of AI in Browser-Based FL Studio
Here’s where things get really interesting.
A cloud-based DAW is the perfect environment for deep AI integration.
Expect features like:
-
AI-assisted chord generation
-
Smart melody suggestions
-
Auto-arrangement tools
-
AI mixing and mastering
-
Style-based beat generation
Because processing happens in the cloud, AI models can be far more powerful than anything running locally.
This transforms FL Studio from a tool into a creative partner.
What About Plugins? The Big Question
Plugins are the heart of modern production — so what happens to them?
A browser-based FL Studio would likely rely on:
-
Built-in instruments and effects
-
Cloud-hosted equivalents of popular plugins
-
Subscription-based plugin access
-
AI-powered replacements for traditional tools
While some third-party plugins may struggle to adapt initially, history shows that developers always follow the users.
Where the producers go, the plugins will follow.
Potential Downsides (Let’s Be Real)
No revolution comes without trade-offs.
1. Internet Dependency
No connection = no studio.
For producers in regions with unstable internet, this could be a serious limitation. Offline modes may exist, but cloud-first systems always rely heavily on connectivity.
2. Latency Concerns
Even with modern optimizations, ultra-low-latency performance for live recording is still a challenge in cloud environments.
This could impact:
-
Vocal tracking
-
Live instruments
-
Real-time performance recording
Hybrid solutions may emerge to solve this.
3. Subscription Model Fatigue
Browser-based software often means subscriptions.
While subscriptions lower entry costs, some producers still prefer one-time purchases and ownership.
FL Studio’s traditional “lifetime free updates” model has been a huge part of its identity — and changing that would be controversial.
4. Creative Control Concerns
Some producers fear cloud platforms could:
-
Limit customization
-
Restrict file access
-
Lock users into ecosystems
These concerns are valid — and how Image-Line handles them will matter greatly.
How This Could Change the Music Industry
If FL Studio successfully goes fully browser-based, the ripple effects will be massive.
1. Faster Music Creation Cycles
Lower friction means more music — faster.
Expect:
-
More releases
-
Faster trend cycles
-
Shorter production timelines
The industry will move even more quickly than it already does.
2. Global Collaboration Becomes Normal
Artists from different countries, cultures, and genres will collaborate effortlessly.
This could lead to:
-
New hybrid genres
-
Faster cultural exchange
-
More diverse music landscapes
3. Education Gets a Massive Boost
Music schools, online courses, and educators will benefit enormously.
Students won’t need:
-
Powerful computers
-
Complex installations
They’ll just open a browser and start learning.
4. The Rise of the “Always-On Producer.”
When your DAW lives in the cloud, you’re never disconnected from creativity.
Ideas don’t get lost.
Projects don’t get stuck on one machine.
Momentum never dies.
Is This the End of Desktop DAWs?
Not at all.
Desktop DAWs aren’t going anywhere — at least not soon.
Instead, we’re likely to see a hybrid future:
-
Browser-based DAWs for flexibility, collaboration, and speed
-
Desktop DAWs for deep control, offline work, and heavy processing
Producers will choose tools based on workflow, not ideology.
Why FL Studio Is Perfectly Positioned for This Move
FL Studio’s user base is:
-
Young
-
Tech-savvy
-
Experiment-friendly
-
Open to new workflows
Many FL users already:
-
Produce quickly
-
Use loop-based creativity
-
Embrace unconventional methods
That makes FL Studio an ideal candidate to lead this transition.
Final Thoughts: A New Era Begins
FL Studio going completely web browser mode isn’t just a technical upgrade — it’s a philosophical shift.
It says:
-
Music production should be accessible
-
Creativity shouldn’t be locked to hardware
-
Collaboration should be effortless
-
Tools should adapt to artists — not the other way around
We are watching the early stages of a transformation that could redefine how music is made for the next generation.
The studio is no longer a place.
It’s no longer a computer.
It’s no longer even software.
👉 It’s a browser tab.
And the future just hit “open project.”
- FL Studio Goes Completely Web Browser Mode: The Future of Music Production Has Arrived
- FL Studio web browser
- FL Studio online
- FL Studio browser version
- FL Studio cloud
- FL Studio 2025
- FL Studio webbased DAW
- FL Studio future
- Online music production software
- Webbased DAW
- Cloud music production
- Browserbased DAW
- Online DAW for producers
- Music production in the browser
- FL Studio alternative
- Future of music production
- AI music production
- DAW in the cloud
- Digital audio workstation online
- Is FL Studio going online
- FL Studio browser mode explained
- Can FL Studio run in a web browser
- Will FL Studio be cloudbased
- FL Studio without installation
- Produce music online with FL Studio
- Is FL Studio becoming subscriptionbased
- FL Studio web vs desktop
- Best browser DAW for producers
Exploring Auto-Key by Antares: The Ultimate Tool for Effortless Key Detection in Music Production
Written by Sounds Space
Exploring Auto-Key by Antares: The Ultimate Tool for Effortless Key Detection in Music Production
In the ever-evolving world of music production, where technology bridges the gap between creativity and technical precision, few companies have left as indelible a mark as Antares Audio Technologies. Founded in the late 1990s, Antares revolutionized the industry with the introduction of Auto-Tune in 1997, a pitch-correction software that became synonymous with modern vocal processing. From Cher's iconic "Believe" to the auto-tuned anthems of contemporary pop, hip-hop, and electronic music, Auto-Tune has shaped the sound of generations. But Antares didn't stop there. As producers demanded more streamlined workflows, the company expanded its suite of tools to include innovative plugins like Auto-Key.
Auto-Key by Antares, now in its second iteration as Auto-Key 2, is a game-changer for musicians, producers, and engineers. Released initially around 2019 and upgraded to version 2 on April 14, 2023, this plugin automates the often tedious process of key and scale detection. In an era where time is money in the studio, Auto-Key eliminates guesswork, allowing creators to focus on what matters most: the music. Whether you're a seasoned pro fine-tuning vocals or a beginner experimenting with loops and samples, Auto-Key integrates seamlessly into your digital audio workstation (DAW), enhancing productivity and accuracy.
This blog dives deep into Auto-Key's origins, features, functionality, and real-world applications. We'll explore how it fits into the broader Antares ecosystem, share user insights, and offer practical tips to maximize its potential. By the end, you'll see why Auto-Key is an essential addition to any producer's toolkit. And if you're ready to add it to yours, you can purchase Auto-Key on www.soundsspace.com for just $49.00, with instant digital delivery via email.
The History and Evolution of Auto-Key
Antares Audio Technologies has a storied history rooted in innovation. The company's flagship product, Auto-Tune, was born from the vision of Dr. Andy Hildebrand, a geophysicist who applied seismic data analysis techniques to audio processing. Released on September 19, 1997, Auto-Tune quickly became the industry standard for pitch correction, used by artists across genres to achieve flawless vocals.
As music production software advanced, producers faced new challenges. Determining the key and scale of a track—essential for effective pitch correction and harmonic alignment—often required manual analysis or third-party tools. This bottleneck inspired Antares to develop Auto-Key. The first version debuted around 2019, addressing these pain points by automating detection processes. It was a natural extension of the Auto-Tune family, designed to work hand-in-hand with plugins like Auto-Tune Pro, EFX+, and Artist.
The release of Auto-Key 2 in April 2023 marked a significant upgrade. Coinciding with updates to Auto-Tune EFX+ 10.0, this version introduced enhanced detection algorithms powered by TONART V3 from zplane.development, improved tempo recognition, and a more intuitive user interface. Antares also expanded its offerings with a mobile app, Auto-Key Mobile, launched in August 2021 for iOS (with Android and Windows versions following), allowing on-the-go key detection. These developments reflect Antares' commitment to adapting to modern workflows, where producers might switch between studio sessions and mobile ideation.
In the context of 2025's music landscape, where AI-driven tools are commonplace, Auto-Key stands out for its reliability and integration. It's not just a standalone plugin; it's part of a subscription-based ecosystem like Auto-Tune Unlimited, which bundles multiple vocal processing tools. This evolution underscores Antares' role in democratizing professional-grade production, making advanced features accessible to home studios and major labels alike.
What is Auto-Key?
At its core, Auto-Key is an automatic key, scale, and tempo detection plugin. It's designed to analyze audio in real-time or from uploaded files, identifying the fundamental musical elements that form the backbone of any track. Unlike traditional methods that rely on ear training or spectrum analyzers, Auto-Key uses sophisticated algorithms to detect the key (e.g., C Major or A Minor), scale (major, minor, harmonic minor, etc.), and even tempo in beats per minute (BPM).
The plugin is particularly tailored for use with Auto-Tune, Antares' pitch-correction software. By detecting these parameters, Auto-Key can instantly transmit them to compatible Auto-Tune instances across your project. This means no more manually inputting scales for each vocal track—Auto-Key handles it with a single click. It's ideal for scenarios like remixing, where matching keys between samples is crucial, or live sessions where quick adjustments are needed.
Auto-Key supports a variety of audio formats for file-based analysis, including MP3, WAV, FLAC, and AIFF. It also detects the tuning reference frequency, which is vital for tracks not tuned to the standard A=440 Hz (common in older recordings or alternative tunings). The onscreen keyboard visually highlights detected pitches, providing an intuitive way to verify and tweak results.
In essence, Auto-Key bridges the gap between musical theory and practical application. For DJs curating sets, it helps find harmonically compatible tracks. For producers, it streamlines vocal tuning, ensuring everything sits perfectly in the mix. Its polyphonic analysis makes it suitable for full mixes, not just individual instruments, setting it apart from monophonic-focused tools.
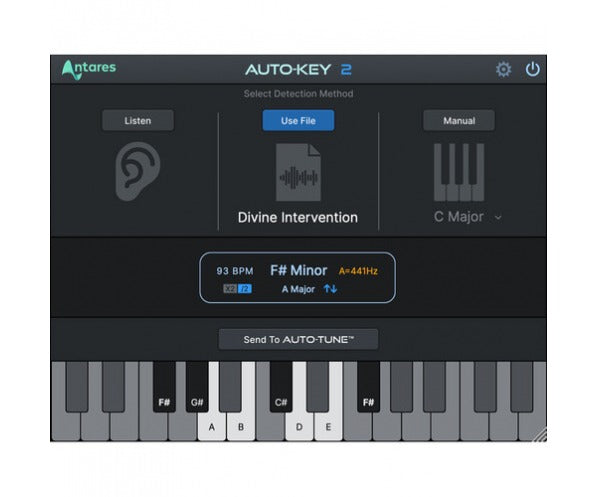
Here's a screenshot of the Auto-Key 2 interface, showcasing its clean design with the central display, keyboard, and controls for modes like Listen and File.
Key Features of Auto-Key 2
Auto-Key 2 builds on its predecessor with a host of refined features that cater to professional demands. Let's break them down:
- Automatic Detection: The plugin scans audio in real-time via your DAW's insert or from dragged-and-dropped files. It identifies key, scale, tempo, and reference pitch with high accuracy, thanks to the updated TONART V3 engine. This is especially useful for complex arrangements where manual detection would be time-consuming.
- Integration with Auto-Tune: One-click sending of detected parameters to all compatible Auto-Tune plugins in your session. This includes Auto-Tune Pro, Access, EFX+, and Artist. For projects with multiple vocal layers, this feature alone can shave hours off your workflow.
- Modes of Operation:
- Listen Mode: Analyzes live audio playback.
- File Mode: Processes uploaded audio files quickly.
- Manual Mode: Allows user overrides for custom scales or keys.
- Automation Support: Enables key changes over time, perfect for tracks with modulations.
- User Interface Enhancements: Resizable window with light and dark modes for better visibility in various studio environments. The central display shows detected key, scale, tempo, and reference frequency clearly.
- Tempo Detection: Newly emphasized in version 2, this helps sync elements in remixes or ensure rhythmic alignment.
- Reference Frequency Adjustment: Detects deviations from A=440 Hz and allows corrections, ensuring compatibility with diverse recordings.
- Compatibility: Works as a VST, AU, or AAX plugin on Mac (macOS 10.14+) and Windows (10+). Requires compatible DAWs like Pro Tools 2018.1 or later, Logic Pro, Ableton Live, etc. It's 32-bit and 64-bit supported.
These features make Auto-Key versatile for genres from pop to EDM, where precise harmonic matching is key to a polished sound.

This image highlights the plugin's keyboard view, where detected notes light up for visual confirmation.
How Auto-Key Works: A Step-by-Step Guide
Using Auto-Key is straightforward, even for novices. Insert the plugin on your master bus or a mix bus containing polyphonic audio—avoid using it on solo vocals or monophonic instruments, as it's optimized for fuller mixes.
- Setup: Load Auto-Key into your DAW. Ensure compatible Auto-Tune instances are present in your project.
- Analysis:
- In Listen Mode, play your track; Auto-Key analyzes in real-time.
- For files, drag and drop supported formats into the plugin window.
- Detection: The algorithm processes the audio, displaying results in seconds. You'll see the key (e.g., E Minor), scale type, BPM, and reference pitch.
- Transmission: Click "Send to Auto-Tune" to update all linked plugins. If your track has key changes, use automation lanes to program shifts.
- Refinements: If detection isn't spot-on (due to complex chords or noise), switch to Manual Mode to select from presets or customize.
In practice, this workflow saves immense time. For instance, when tuning vocals to a beat, Auto-Key ensures the scale matches, preventing off-key artifacts.
Buy AutoTune 2026 + FREE AutoKey 2 | Vocal Processing | Plugin ...
Another view of the interface, demonstrating the detection display and settings panel.
User Reviews and Real-World Experiences
Auto-Key has garnered mixed but generally positive feedback. On Sweetwater, it holds a 3/5 rating from four reviews as of 2025. Kyle L., a studio owner, praises the one-click Auto-Tune syncing: "Hooray! It sets all Auto-Tunes to the same key effortlessly." Evaristo L. raves, "Love this plugin... definitely recommended." However, criticisms include licensing issues (Marc M.: "Stops deauthorizing itself") and occasional inaccuracies (BFS: "Gives wrong BPM and key").
On Reddit and forums like KVR, users note its utility for quick checks but advise verifying results manually for tricky tracks. Professionals like mixing engineer Dan Parry highlight its role in modern production: "Auto-Tune has shaped records, and Auto-Key speeds that up."
Overall, it's valued for efficiency, though some wish for better accuracy in edge cases.
Tips and Tricks for Maximizing Auto-Key
- Use on master buses for best polyphonic detection.
- Combine with Auto-Tune's Humanize for natural-sounding corrections.
- For remixes, analyze loops individually via File Mode.
- Adjust reference frequency for vintage tracks.
- Test in demo mode before buying to ensure DAW compatibility.
Conclusion
Auto-Key by Antares is more than a plugin—it's a workflow accelerator that embodies the company's innovative spirit. From its historical roots in Auto-Tune to the advanced features of version 2, it empowers creators to produce with precision and speed. Whether detecting keys for vocals or matching samples, Auto-Key delivers.
Ready to try it? People can purchase Auto-Key on www.soundsspace.com for $49.00, with digital delivery and full compatibility details provided. Elevate your productions today!
Zebralette 3 is FREE! Get it now while you can!
Written by Sounds Space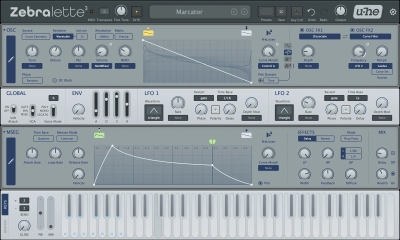
Discovering Zebralette 3: u-he's Free Synth Revolutionizing Sound Design
In the ever-evolving world of music production, few things excite producers, sound designers, and hobbyists quite like a powerful, free tool that punches above its weight. Enter Zebralette 3, the latest iteration of u-he's beloved free synthesizer, released just a couple of weeks ago on December 10, 2025. This single-oscillator powerhouse, derived directly from the flagship Zebra 3 synthesizer, is not just a teaser—it's a fully functional instrument capable of crafting intricate, evolving sounds that rival paid plugins. And the best part? It's completely free, with no strings attached, no demo limitations, and no need for a serial number. In this blog post, we'll dive deep into what makes Zebralette 3 a must-download, exploring its history, features, updates, and why it's poised to become a staple in digital audio workstations (DAWs) worldwide.
A Brief History of u-he and the Zebra Legacy
To appreciate Zebralette 3, we need to step back and look at u-he, the German software company founded by Urs Heckmann in 2001. u-he has built a reputation for creating high-quality virtual instruments and effects that blend analog warmth with digital precision. Their lineup includes classics like Diva, Hive, and Repro, but the Zebra series stands out as a modular synthesis icon.
The original Zebra, launched in 2004, was groundbreaking for its flexible oscillator design, allowing users to morph between waveforms in ways that went beyond traditional subtractive synthesis. Zebralette, introduced as a free companion in 2012, stripped Zebra down to its essence: one oscillator with basic modulation and effects. It was designed as both an entry point for beginners and a creative tool for pros, with presets transferable to the full Zebra. Over the years, Zebralette evolved through updates, but version 3 marks a quantum leap, aligning it with the newly released Zebra 3 (which entered public beta on the same day).
Zebra 3 itself has been highly anticipated, with development spanning years. It introduces advanced spectral synthesis, spline-based editing, and a modular architecture that lets users build complex patches from scratch. Zebralette 3 extracts the core oscillator from this beast, embedding it in a streamlined environment. This isn't just a rehash—it's a fresh take, optimized for low CPU usage and modern workflows, making it accessible even on modest setups.
What Makes Zebralette 3 Stand Out?
At its heart, Zebralette 3 is a spectral synthesizer with a single oscillator, but don't let that fool you. This oscillator is a chameleon, capable of wavetable-like morphing, additive synthesis, and waveform manipulation that can yield everything from punchy basses to ethereal pads. The audio engine switches seamlessly between traditional wave rendering and additive modes, supporting up to 1024 harmonics in Curve Spectrum mode for logarithmic scaling across about 10 octaves.
The interface is clean and intuitive, perfect for newcomers while offering depth for experts. The main view centers on the Oscillator Editor, where you can draw and sculpt waveforms using spline curves, Bézier handles, freehand tools, and warping functions like Scale, Multiply, Warp, and Rotate. This draws inspiration from vector graphics software, allowing precise control over the orange trace that visualizes the waveform in real-time or spectrum mode (time vs. frequency). Morphing between up to 16 curves adds dynamism, turning static sounds into evolving textures.
To visualize this, here's a screenshot of the Zebralette 3 interface in action:
Complementing the oscillator are two serial FX blocks for mangling, which include options such as filters, formants, phase distortion, spectral decay (where harmonics fade at different rates for plucked or atmospheric effects), warping, windowing, and animation. These aren't afterthoughts—they're integral to shaping the raw oscillator output into usable tones.
Modulation is where Zebralette 3 shines. It includes a classic ADSR envelope with velocity sensitivity, but the star is the MSEG (Multi-Stage Envelope Generator). This flexible editor lets you draw dynamic curves with up to seven morphable MSEGs, complete with looping, grid snapping for rhythmic patterns (X-axis) or pitch sequencing (Y-axis in 12/24 steps), and spline tools for smooth accelerations or arcs. Two LFOs provide additional movement: one global, one per voice, with multiple waveforms, tempo sync, and phase control.
The modulation matrix offers six slots for routing sources (like LFOs, MSEG, velocity, modwheel) to destinations, with modifiers such as quantization, sample & hold, or slew limiting. You can even modulate the modulation depth, adding layers of complexity without overwhelming the user.
On the effects side, global delay (syncable, stereo, or ping-pong) and reverb (from short ambiences to vast halls) add polish. These are simple but effective, ensuring your sounds sit well in a mix without needing external plugins.
What's New in Zebralette 3?
Building on its predecessors, Zebralette 3 introduces several game-changers. The spline-based editing in both the Oscillator and MSEG editors allows for smoother, more organic shapes—think Bézier curves for fluid transitions that were clunky in older versions. Morphing capabilities have expanded, with up to 16 curves in the oscillator and seven in the MSEG, enabling cinematic evolutions ideal for film scores or ambient music.
The audio engine now supports additive synthesis alongside wavetable export in .WAV format, bridging gaps with other synths like Serum or Vital. CPU efficiency has been drastically improved, making it run lighter than ever—perfect for stacking multiple instances in a project. u-he also uses Zebralette 3 as a testbed for their new License Card system, hinting at future innovations.
Reviews highlight these updates as transformative. Synthtopia notes the "dynamic toolbox from vector graphic apps" for waveform mangling, while Bedroom Producers Blog praises the presets for their nuance, covering polysynths, pads, percussion, and organs with subtle movement. Demo tracks like "Oddvar – Stripes" (a deep house piece using only Zebralette 3 sounds) and "Hyboid – Rowlf’s Daydream" (fluffy jazz rock) showcase its versatility.
System Requirements and Compatibility
Zebralette 3 is designed for broad accessibility. It runs on macOS 10.10+, Windows 7+, and Linux (glibc 2.28+), with CPU requirements starting at Intel Nehalem or AMD Bulldozer (Apple M1 supported). You'll need about 50-125 MB of disk space and a display of at least 1280x1024 pixels. Formats include CLAP, AUv2, VST3, and AAX (Pro Tools 10.3.7+), ensuring compatibility with most DAWs like Ableton Live, Logic Pro, FL Studio, or Reaper. Linux support is beta, with community assistance via forums.
No standalone version—it's a plugin only, so integrate it into your host software. MIDI learn and host automation make it seamless for live performance or studio work.
Getting Started: Download and Installation
Downloading Zebralette 3 couldn't be simpler. Head to the u-he website's freeware section and grab the installer for your platform—no registration required. Installation is straightforward: run the setup, scan for plugins in your DAW, and you're ready. u-he provides a user guide PDF and demo videos to get you up to speed.
Once loaded, explore the factory presets (though not quantified, they're diverse and inspiring). Start with basic waveforms, then experiment with morphing and FX to create custom patches. Tip: Use the oscilloscope view to visualize changes in real-time—it's a great learning tool.
Sound Design Possibilities and Tips
Zebralette 3 excels in spectral and evolving sounds. For basslines, use spectral decay for punchy attacks; for pads, morph between curves with MSEG for breathing textures. Sci-fi effects? Phase distortion and warping deliver alien vibes.
Stack instances for polyphony beyond the built-in 16 voices, or layer with other synths. Export curves as wavetables to feed into compatible plugins. Beginners: Stick to the ADSR and LFOs first; pros: Dive into the mod matrix for intricate routings.
Compared to other free synths like Vital or Surge XT, Zebralette 3 offers unique spectral tools without the bloat. Vital is great for wavetables, but Zebralette's additive mode and spline editing provide a different flavor—more organic, less grid-based.
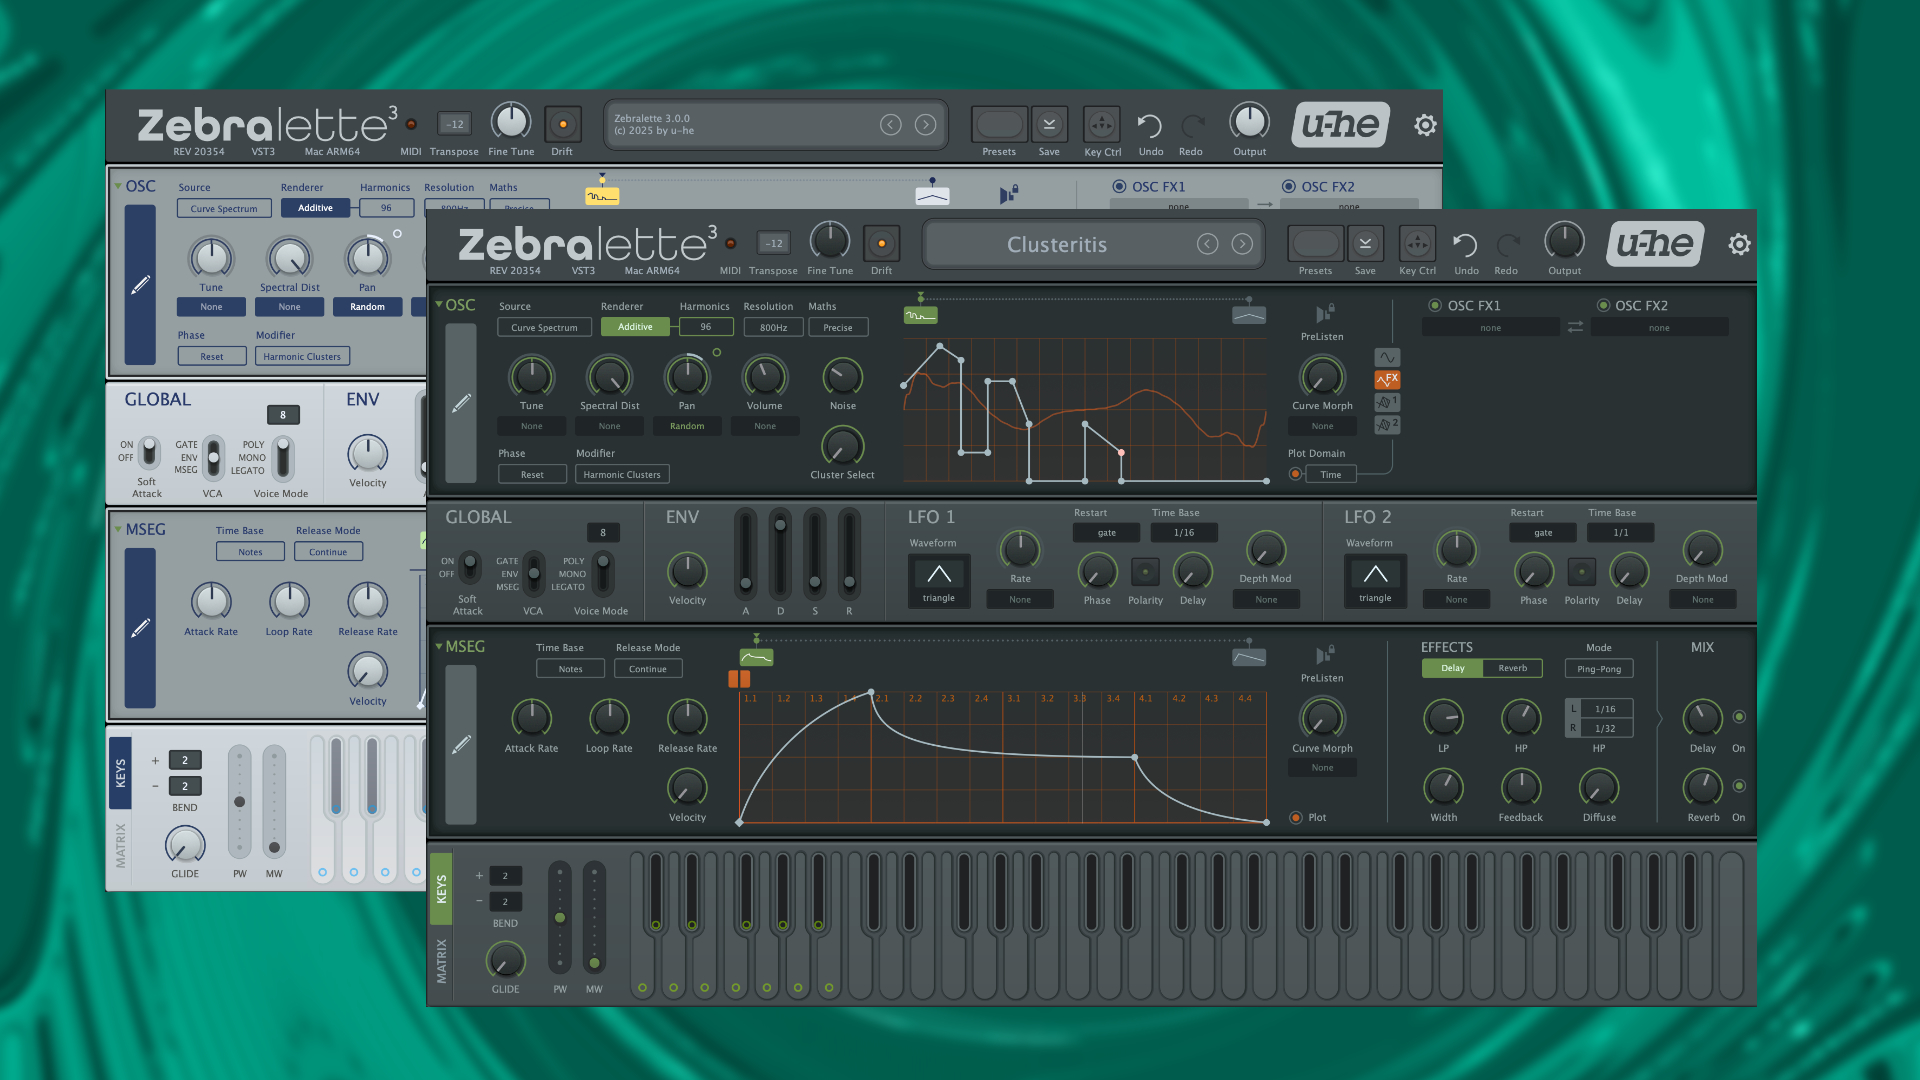
Here's another look at the interface to inspire your setup:
Why Zebralette 3 is a Game-Changer for Freeware
In a market flooded with freemium models, Zebralette 3's outright free status is refreshing. It democratizes high-end synthesis, letting aspiring producers experiment without barriers. For Zebra 3 owners, it's an extra oscillator; for everyone else, it's a standalone gem.
Community feedback is glowing—users call it a "fantastic Christmas gift," praising its depth and efficiency. As music tech advances, tools like this keep creativity alive.
Conclusion: Download and Unleash Your Creativity
Zebralette 3 isn't just free—it's a testament to u-he's commitment to innovation. Whether you're crafting deep house, jazz rock, or experimental soundscapes, this synth delivers. Released amid the holiday season, it's the perfect gift to yourself. Head over to u-he.com, download it, and start exploring. Who knows? Your next hit might start with a single, spectral oscillator.
Soundtoys Gives Away EchoBoy Jr. for Free: Why This Holiday Drop Is a Game-Changer for Producers in 2025
Written by Sounds Space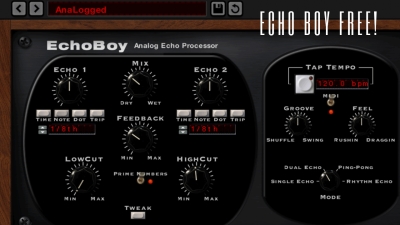
Soundtoys Gives Away EchoBoy Jr. for Free: Why This Holiday Drop Is a Game-Changer for Producers in 2025
Every December, the audio world turns its attention to Soundtoys. For years, their “12 Days of Soundtoys” promotion has become a seasonal ritual—an end-of-year celebration where producers, sound designers, and mix engineers hope for discounts on the company’s iconic plugins. But in 2025, Soundtoys has taken things to an entirely new level by offering something that is far more impactful than a typical flash sale: a free download of EchoBoy Jr., one of their most beloved delay processors.
This move sent waves through the music production community the moment it dropped. EchoBoy Jr. is not a throwaway plugin or a limited-function demo. It’s a fully fledged analog-modeled delay engine built on the same DNA as the legendary EchoBoy, a plugin widely regarded as one of the most musical and flexible delay effects ever created. For Soundtoys to give this away for free—even for a short period—is nothing short of remarkable.
This blog explores what EchoBoy Jr. actually offers, how it compares to the full version of EchoBoy, why Soundtoys chose to make this bold holiday offering, and what it means for producers, mixing engineers, and creators moving into 2026. Whether you’re a long-time Soundtoys loyalist or brand new to their ecosystem, this free release deserves your attention.
The Legacy Behind EchoBoy: Why EchoBoy Jr. Matters
To understand why the free release of EchoBoy Jr. is so significant, you have to appreciate the legacy of the original EchoBoy.
EchoBoy has been one of the most widely used delay plugins in professional music for nearly two decades. From Grammy-winning engineers to underground electronic producers, the plugin has been a staple because of its unmistakable analog-inspired character, versatility, and ability to sit perfectly in the mix. EchoBoy can emulate countless pieces of rare hardware—Memory Man, Space Echo, TelRay, tape units, vintage digital boxes—and can operate as everything from a slapback generator to a washed-out ambient machine.
EchoBoy Jr. was created as a streamlined version that captures the soul, tone, and warmth of EchoBoy without the full advanced editing panel. Instead of overwhelming the user with endless tweakable parameters, Soundtoys designed EchoBoy Jr. to give producers a fast, straightforward way to dial in musical delays.
In other words: EchoBoy Jr. is still a Soundtoys-quality delay. It still sounds lush, warm, punchy, and alive. It’s simply more focused—and easier to use.
And now, incredibly, it’s free.
What EchoBoy Jr. Offers: A Breakdown of Its Features
Despite its simplified interface, EchoBoy Jr. is not “lite” in the sense that it sacrifices sound quality. Instead, it distills everything down to the essentials that matter most in real-world production. Here’s what stands out.
1. Seven Distinct Echo Styles
EchoBoy Jr. includes seven echo types, each representing a specific analog or digital heritage:
-
Studio Tape – Warm, smooth, and saturated
-
Plex – A richer, multi-delay sound inspired by classic digital units
-
Ambient – Bigger, atmospheric, ideal for cinematic soundscapes
-
Transmitter – Lo-fi, grungy, and textured
-
Memory – A nod to the classic Memory Man pedal
-
Cheap Tape – Imperfect, gritty tape echo
-
Space – A spacious, deep, classic echo machine tone
These aren’t gimmicky presets—they are highly crafted models based on Soundtoys’ deep study of analog hardware.
Each mode has its own EQ curve, saturation behavior, modulation movement, and overall vibe. Even when used subtly, the tonal fingerprints of these styles help delays blend into a mix in ways that stock DAW delay plugins struggle to achieve.
2. A Simple but Powerful Interface
EchoBoy Jr. is designed for speed. The front panel includes:
-
Mix
-
Echo Time (including note sync)
-
Feedback
-
Low Cut & High Cut filters
-
Input and Output gain
-
Saturation control
There’s also a “Mode” selector offering mono, wide, and ping-pong for stereo manipulation—a small addition, but one that has huge implications for widening vocal delays or creating bouncing movement in electronic productions.
The simplicity means you don’t spend five minutes browsing menus or diving into hidden mod panels like you might in larger plugins. You simply pick a style, shape the tone, and move on.
3. High-Quality Saturation & Drive
One of the biggest elements that separates Soundtoys delays from more generic ones is how they handle saturation. EchoBoy Jr. inherits this character.
When you drive the saturation knob, you don’t get harsh digital clipping—you get musical harmonic enhancement. It thickens vocals, pushes guitars forward, and lets synth lines bloom. It also allows for vintage-style crunch in genres like lo-fi hip-hop, garage, techno, indie rock, and ambient.
4. Glide Function
The glide switch introduces pitch-shifting effects during delay time changes, mimicking how classic bucket brigade and tape delays behave. This is a subtle detail, but it’s one that adds an extra layer of analog realism and creative sound-design potential.
5. DSP That Feels Analog
Although EchoBoy Jr. is fundamentally a digital plugin, its design philosophy is lifted straight from the analog world. Subtle imperfections—modulation, wow/flutter, nonlinearities—are part of its sonic identity. This is why EchoBoy delays feel musical rather than mathematical.
Why Soundtoys Gave Away EchoBoy Jr.: A Strategic Move With Big Implications
At first glance, giving away such a high-value plugin for free might seem like a surprising decision. Soundtoys could easily charge £49–£89 for this product and most producers would pay for it without hesitation.
But Soundtoys’ holiday promotions have always been more than simple marketing—they’re community-building moments. By making EchoBoy Jr. free during the 12 Days of Soundtoys, the company accomplishes several strategic goals.
1. Lowering the Entry Barrier to Their Plugin Ecosystem
Soundtoys plugins are premium products, and many new producers hesitate to invest heavily in effects at the beginning of their journey. By offering a high-quality free entry point, Soundtoys encourages newcomers to experience professional-grade sound design firsthand.
Once a producer integrates EchoBoy Jr. into their workflow, they’re far more likely to:
-
Explore the full EchoBoy
-
Purchase bundles
-
Invest in other Soundtoys classics like Decapitator, Little Plate, Crystalizer, or Tremolator
In other words, Soundtoys gains long-term customers through short-term generosity.
2. Strengthening Brand Loyalty
Soundtoys already has a strong reputation, but offering one of their most musical plugins for free amplifies goodwill. It positions them not just as a business, but as a company that genuinely supports creators.
For many producers—especially beginners—this will be the first “premium-feeling” delay plugin they ever use. And that kind of experience builds loyalty.
3. Driving Massive Visibility During the Year’s Most Competitive Month
December is crowded with plugin sales. But a free, professional-grade plugin instantly cuts through the noise.
When news broke across Twitter, Reddit, Discord servers, Facebook groups, and producer forums, Soundtoys dominated the conversation. Free promotions generate word-of-mouth at a scale that paid ads rarely match.
4. Showcasing the Quality of Their Analog Modeling
Giving away a plugin is the fastest way for Soundtoys to demonstrate their sonic superiority over competitors. Once producers hear the difference between EchoBoy Jr. and free delays included in DAWs, the brand’s value becomes crystal clear.
How EchoBoy Jr. Stacks Against Other Free Delays in 2025
2025 has been a strong year for free plugins. Companies like Baby Audio, Universal Audio, Waves, and Kilohearts have all released free or low-cost tools. But EchoBoy Jr. stands out in several ways.
1. Warmth and Character
Most free delays sound digital and static. EchoBoy Jr. has movement, color, personality, and a musical response that feels alive.
2. Analog-Inspired Imperfection
Few free delays emulate analog tape, gear noise, modulation, or saturation convincingly. Soundtoys’ modeling is carefully crafted and historically accurate.
3. Immediate Usability
Some free delays offer a pile of features but are overwhelming for new users. EchoBoy Jr. strikes the perfect balance: simple enough for beginners, deep enough for professionals.
4. Mix-Ready Sound
Even at default settings, EchoBoy Jr. slots into a mix without demanding heavy EQ or processing.
Practical Use Cases: How Producers Are Using EchoBoy Jr. Today
The free giveaway has sparked thousands of new workflows across genres. Here are the most common (and most effective) ways producers are using EchoBoy Jr. right now.
1. Vocal Delay for Pop, Rap, and Electronic Music
Using the Studio Tape or Ambient modes with light saturation and moderate high-cut creates a warm vocal delay that doesn’t clash with the lead.
2. EDM and House Delay Chops
Producers are using EchoBoy Jr. to shape tempo-synced rhythmic delays that add energy to builds, pre-drops, and transitional moments.
3. Guitar Slapbacks in Rock and Indie
The Cheap Tape mode is ideal for subtle, classic slap delays reminiscent of vintage rock records.
4. Lo-Fi and Chillhop Texture
Transmitter and Memory modes are perfect for gritty, character-rich echoes that thicken samples or soften melodies.
5. Ambient Soundscapes
EchoBoy Jr. can easily create large, evolving spaces using long feedback times and darker tones.
6. Creative FX and Sound Design
The glide function enables pitch-warped echoes that add surreal movement to synths, impacts, and cinematic FX.
What This Means for Music Producers Heading Into 2026
The free release of EchoBoy Jr. signals something bigger about the state of the plugin industry and the changing environment for producers:
1. Premium-Quality Tools Are Becoming More Accessible
The old days of needing thousands of pounds in hardware and software are gone. In 2025–2026, producers can build high-end mixes using tools that cost nothing.
2. The Competition Among Plugin Companies Is Pushing Innovation
To keep market share, companies now offer free high-quality products and adopt new pricing strategies—a massive win for creators.
3. The Bar for “Free” Plugins Has Been Raised Dramatically
Soundtoys just reset expectations. If a free plugin can sound this good, producers will expect much more from others.
4. More New Producers Will Develop Professional-Level Skills
When world-class tools become free, the barrier to learning professional sound design drops heavily.
Final Thoughts: Why You Should Not Miss This Free Plugin Drop
Soundtoys’ decision to give away EchoBoy Jr. during the 12 Days of Soundtoys is one of the most generous—and strategically brilliant—moves we’ve seen in the plugin world in years. It benefits everyone:
-
Beginners get access to professional effects
-
Professionals gain a fast, reliable go-to delay
-
The music scene becomes richer with better productions
-
Soundtoys strengthens its already legendary brand reputation
If you are producing vocals, guitars, electronic music, ambient textures, cinematic soundscapes, or anything else that relies on delay for emotional depth, movement, and atmosphere, then EchoBoy Jr. deserves a permanent spot in your plugin toolbox.
With its analog warmth, intuitive design, and signature Soundtoys character, this plugin is more than a holiday gift—it’s a long-term creative asset.
And now, for this limited time, it’s completely free.
Zebra 3 U-he’s Modular Playground Built for a New Era
Written by Sounds Space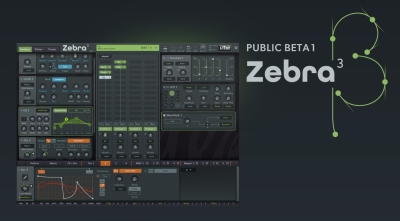
Zebra 3 — u-he’s modular playground rebuilt for a new era
U-he’s Zebra has long been a staple in the sound-designer’s toolkit: a hybrid modular synth that blended subtractive, additive, FM, and wavetable techniques into a flexible, patchable environment. With Zebra 3, u-he are not simply updating the old codebase — they have rebuilt the instrument from the ground up, delivering a redesigned engine, new module types and a fresh workflow that aims to make Zebra as much a “sound design shop” as a classic synth. This piece examines what Zebra 3 is, why it matters, how it sounds, and how to approach it in real music production.
The story so far — development and public beta
Zebra 3’s development has been gradual and careful. After years of incremental updates to Zebra2 and related products, u-he announced a public beta program for Zebra 3 earlier in the year; that public beta has allowed the company to stabilise a substantially new oscillator and modulation architecture while collecting feedback from an engaged community. In parallel, u-he released Zebralette 3 — a free, lightweight sibling that previews the new oscillator engine — as a preparatory step towards the full Zebra 3 release. The public messaging from u-he makes two things clear: the engine is new and ambitious, and some parts of the UI, factory bank, and CPU optimisation were still being refined in beta.
That approach makes sense for an instrument of this complexity. Zebra has always attracted producers who enjoy experimentation and careful patch construction, and u-he have chosen to engage that audience directly rather than rush a polished but compromised product. Public beta snapshots and forum threads reflect active troubleshooting, feature tuning, and honest discussion around CPU cost versus sonic payoff.
What’s different in Zebra 3 — the headline changes
From the hands-on previews and u-he’s own notes, a few core innovations define Zebra 3:
-
A rebuilt oscillator and additive/wavetable tooling. The new oscillator engine — already previewed in Zebralette 3 — brings spline-based waveform editing, additive synthesis, and richer wavetable manipulation. That opens a wide range of spectral possibilities, from razor-sharp harmonics to soft, evolving textures.
-
Vector and modular routing reimagined. Zebra 3 enhances the modular approach of its predecessors with more explicit routing options and vector-style control over how modules blend and morph. This gives designers intuitive control over timbral morphing across multiple oscillators and filter paths.
-
New modules and effects. u-he has added fresh module types and expanded effect options that are geared toward cinematic and evolving sounds — not just classic analog emulation. Expect resonators, improved filters, and effects that play nicely with the additive engine.
-
Workflow & UI upgrades (progressive). Zebra 3’s UI and workflow have been rethought; however, u-he has been transparent that UI finalisation was part of the beta cycle. The company released Zebralette 3 as a learning ground to get users comfortable with new curve editors and modulation visualisations before the full synth ships.
-
Performance considerations. The new algorithms and higher internal fidelity mean modules can be more CPU-intensive than their Zebra2 equivalents. U-he’s early notes and forum threads point to optimisation work ongoing during beta: the sonic improvements come at a cost, and the company is balancing CPU demand against the new capabilities.
These changes are not incremental; they position Zebra 3 as a contemporary, spectral/ additive hybrid rather than a straight sequel that merely sheds legacy constraints.
How Zebra 3 sounds — character and use cases
Zebra’s identity has always been about motion, timbral complexity, and the art of layering. Zebra 3 amplifies those strengths while expanding the palette:
-
Spectral goodness. The additive and spline tools let you sculpt harmonic content with surgical precision. That means crystalline bell tones, evolving pads with shifting overtone structure, and harmonic textures that morph without repeating obvious loops. Use cases: cinematic scoring, ambient pads, atmospherics for games and film.
-
Textural synthesis. The combination of wavetable, additiv,e and vector blending allows you to create textures that feel alive — useful for risers, morphing FX, and background beds that never sound static. Layering Zebra 3 with a simpler synth is a common production tactic: Zebra handles motion while a basic analog emulation carries the rhythmic or tonal anchor.
-
Experimental leads and percussion. With the right routing and filter choices, Zebra 3 can produce metallic, percussive tones and glassy leads with long spectral tails — very helpful when you want something that cuts but remains interesting across a mix.
-
Interactive and generative patches. The improved modulation and vector controls make it easy to design patches that respond to performance gestures (MIDI CC, aftertouch, mod wheel) and internal clocks — thereby supporting generative and evolving composition workflows. Early testers describe Zebra 3 as more of a “playground” than a preset bank.
Practical considerations — compatibility, CPU, and workflow
If you plan to adopt Zebra 3 into a project, a few pragmatic points matter:
-
System resources. Expect higher CPU usage per module than older Zebra versions; plan your sessions accordingly and consider freezing or rendering heavy Zebra tracks when arranging. u-he have been optimising during beta, but ambitious patches will still demand modern hardware.
-
Learning curve. Zebra 3 offers more control and more parameters. That comes with extra learning time for users unfamiliar with additive and spline editing. Zebralette 3 (the free preview) is an excellent way to familiarize yourself with the new oscillator and curve tools before committing to the full instrument.
-
Format & DAW support. U-he maintains robust plugin format support (VST3, AU, CLAP, and AAX, where applicable). Check u-he’s official notes for the latest compatibility details — particularly if you use Apple silicon or rely on AAX for Pro Tools workflows.
-
Factory content & community presets. The factory bank will be important: Zebra 3’s potential is unlocked in part by well-crafted demos and templates. Expect u-he to ship a sizable factory set, and the community is already producing presets and walkthroughs as the public beta progresses.
Workflow tips — how to get results fast
-
Start in Zebralette 3. Use the free engine preview to learn spline and wavetable editing without committing CPU or license cost.
-
Use vector blending for motion. Place two contrasting oscillators and use vector interpolation to create continuous spectral movement — great for pads and transitions.
-
Reserve Zebra for texture duties. Keep a dry, simpler synth underneath to preserve transient clarity while Zebra supplies atmosphere and motion.
-
Render test patches. When you discover a complex, CPU-heavy timbre, render short loops to WAV and re-import as an audio layer to preserve the sound while reducing CPU load.
Who should consider Zebra 3?
Zebra 3 is best for producers and composers who prioritise sound design and textural motion: film/game composers, ambient and electronic producers, and sound designers working on cinematic FX. If your workflow centres on immediate analogue emulations or you cannot tolerate high CPU usage, Zebra 3 might be overkill — Zebra Legacy and other lighter synths will still be better for those cases.
Final assessment
Zebra 3 is an ambitious rebuild that honours the instrument’s modular heritage while embracing modern synthesis techniques. The public beta and Zebralette 3 previews show a synth that is deep, flexible and tailored for designers who enjoy digging into spectral detail. The tradeoffs are higher CPU demand and a non-trivial learning curve — but for users who want a “toolbox” to craft unique, moving timbres, Zebra 3 looks set to be a defining release. As with any major synth update, watch the public beta notes and the official u-he announcements for final pricing, licensing and the day-one factory bank.
Absynth 6 The Dreamy Return of a Soundscape Legend
Written by Sounds Space
Absynth 6 — The Dreamy Return of a Soundscape Legend
If you grew up hunting for otherworldly pads, plucky evolving textures, and synth sounds that felt like they came from another planet, Absynth has likely been on your "desert-island" shortlist for decades. After a period of quiet and a headline-making discontinuation, Native Instruments has resurrected that uniquely cinematic instrument — now reborn as Absynth 6. This isn’t just a nostalgia reissue: NI and the original developers have overhauled the engine, interface, and performance features while keeping the signature sonic DNA intact.
Why the return matters
Absynth was always more than a polysynth — it was a hybrid laboratory. The original versions fused subtractive, granular, and FM elements with an experimental "mutation" approach to patch generation and a semi-modular architecture that encouraged exploration. That voice — the eerie, evolving textures you can instantly recognise — has influenced countless film, ambient, and electronic producers for 20+ years. Bringing Absynth back matters because there aren’t many modern synths that combine modular-style patching, granular timbres, and a deep modulation ecosystem in a single instrument with that much personality.
What’s new in Absynth 6 (the headline features)
Absynth 6 modernises the original concept in ways that make it much more usable for today’s producers while opening new sonic doors:
-
Hybrid engine refinements — The core still blends granular, FM, wavetable, and subtractive synthesis, but with a rebuilt engine that increases resolution and expands modulation possibilities. That means old patches translate well but can also be pushed much further.
-
Modernised UI & navigation — One of the big complaints about earlier Absynth versions was the UI. Absynth 6 introduces a cleaner, contemporary interface plus a new preset navigation system that leans on AI-style sorting and visual sound previews so you can find textures faster without losing the joy of discovery.
-
MPE & expression — MPE (MIDI Polyphonic Expression) and polyphonic aftertouch support arrive for expressive performance control, which unlocks new ways to shape evolving pads, morphing leads, and responsive ambiences in real time.
-
New filters & effects — The update adds freshly redesigned filters (including a ladder-notch mode that developer Brian Clevinger singled out) and an expanded suite of effects geared toward space, movement, and texture. These aren’t cosmetic: they change the harmonic behaviour and character of Absynth in a way that’s meaningful for sound designers.
-
Point-cloud visualiser & preset browsing — A novel point-cloud style visualisation gives you a spatial sense of presets and how they relate, letting you visually explore sound families rather than scrolling through a list. It’s a playful idea that helps bridge intuitive browsing with serious sound design.
These changes show NI didn’t just dust off an old codebase — they rethought workflow and playability for 2025 while keeping the experimental heart intact.
How it sounds — the character and use cases
If you come to Absynth 6 expecting raw analog brawn, you’ll be partially surprised — and happily so. Absynth has always favoured texture, motion, and spectral complexity over brick-wall analog emulation. In practice that means:
-
Pads that breathe — Absynth is a go-to for evolving pads that avoid steady loops. Its granular and wavetable combo produces motion that sounds organic and cinematic. Great for scoring, ambient, and experimental pop.
-
Weird leads & plucks — By mixing FM and spectral processing, Absynth yields leads and plucks with metallic, bell-like qualities but with evolving tails that keep them interesting across a track.
-
Atmospheres and sound design — The Mutation feature and deep modulation routing make it ideal for creating textures, risers, and movement layers for film and games. The new filters and effects broaden this use even more.
Early hands-on impressions from journalists and sound designers call Absynth 6 “weird in the best way” — a polysynth that rewards exploration and deep patch work rather than simply providing instant one-knob presets. That makes it an excellent tool for producers who enjoy digging under the hood.
Compatibility, system notes, and pricing
Native Instruments has made Absynth 6 available as a download with a retail price in the neighbourhood of €199 / £179 / $199, while owners of previous Absynth versions (2–5) can upgrade at reduced pricing (commonly around €99 for eligible owners). It’s available through the NI store and authorised resellers. Make sure your system meets NI’s general compatibility expectations (macOS and Windows compatibility statements are on NI’s support pages), and check Native Access for updates and installation details.
A few practical things to note: read the compatibility page if you’re running ARM Macs or older legacy OS versions — plugin support across system updates can be a sticking point for heavyweight synths with large sample/granular engines. Also watch for loyalty/upgrade windows if you own older Absynth versions — NI typically offer time-limited upgrade pricing for registered users.
The development story — who made the comeback happen
Absynth’s return isn’t purely a corporate decision — it’s a human story. Brian Clevinger, the original developer, worked closely with NI on Absynth 6’s revival. In interviews, he’s described the process as emotional: bringing a long-lived project back involved balancing respect for the original instrument and a desire to modernise UI, playability, and performance features. Notably, NI involved prominent sound designers in curating presets, making this release feel both historical and collaborative. That lineage helps explain why Absynth 6 sounds like a proper continuation rather than a re-skinned impostor.
Where Absynth 6 sits in 2025’s synth landscape
The synth market in 2025 is crowded: there are highly polished wavetable monsters, modular plugin ecosystems, and lots of analogue emulations. Absynth 6 occupies a unique niche — it’s not trying to be a Swiss army knife for classic analog tones; instead, it’s a creative sound-design engine. Its hybrid toolkit (granular + FM + wavetable + subtractive with semi-modular routing) places it alongside instruments aimed at texture and cinematic scoring rather than simple lead/bass duty. That positioning makes it especially interesting for media composers, ambient artists, and producers who want less predictable, more evolving elements in their productions. Early reviewers say it’s the “biggest update in Absynth history,” because it moves the synth from a legacy toolbox into a living, modern instrument.
Hands-on tips and a quick workflow guide
If you pick Absynth 6 up, here are some practical tips to quickly get results:
-
Start with mutations — Use the Mutation feature to generate wild starting points, then pull back parameters you like. It’s a fast path to discovering complex timbres.
-
Use the point-cloud browser — Let the visual preset mapping nudge you toward families of sounds rather than hunting through names. It helps spark creative patch morphs.
-
Exploit MPE — If you have an MPE controller, map aftertouch and slide to spectral parameters for expressive performance—pads and leads come alive.
-
Layer and automate — Pair Absynth’s evolving textures with a dry synth or sample instrument to keep rhythm and clarity while Absynth fills the atmospheric space.
Downsides and real talk
No synth is perfect. Absynth historically had a steep learning curve and a UI that could feel obtuse; NI has improved that, but the depth that makes Absynth powerful also makes it heavy to learn. If you want immediate, plug-and-play pop sounds, Absynth may feel like overkill. Also, plugin compatibility on the newest OS/hardware combinations can be a snag — always check NI’s compatibility notes and community threads if you're on cutting-edge hardware.
Final verdict — who should buy Absynth 6?
Buy Absynth 6 if you:
-
Love deep sound design and evolving textures.
-
Compose for film, games, or ambient music and need organic, moving soundscapes.
-
Want a hybrid synth that rewards exploration rather than one that gives instant “pop” patches.
Maybe hold off if you:
-
Need immediate, classic analog tones without a learning curve.
-
We are running experimental OS/hardware combos until compatibility is confirmed.
Where to learn more and get started
Head to Native Instruments’ product page for full specs, demos, and the exact pricing/upgrade eligibility. Early reviews and hands-on guides (Sound On Sound, CDM, and several synth bloggers) already offer demo walkthroughs and sound tests if you want to hear Absynth 6 in action before buying. There are also tutorial videos popping up showing workflow tips and patch deep dives
Got Writer’s Block? Kestrel Write’s DAW-Like Lyric Workstation Could Be the Solution
Written by Sounds Space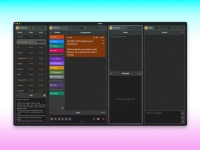
Got Writer’s Block? Kestrel Write’s DAW-Like Lyric Workstation Could Be the Solution
Writer’s block is the silent enemy of every music creator. It doesn’t matter if you’re a platinum-selling songwriter, a bedroom producer, or someone who writes lyrics for fun on a late-night creative burst — when the ideas stop flowing, everything stops. The momentum, the vibe, the excitement, the feeling of “I’m onto something”… all of it freezes.
But what if there was a tool designed specifically to break that creative paralysis?
What if lyric writing finally had its own equivalent of a modern DAW — with workflow-enhancing features, intuitive structure, and built-in creativity boosters?
Enter Kestrel Write: a revolutionary DAW-like lyric workstation built for the modern songwriter. It’s not just another notes app, not another distraction-heavy writing pad, and not another minimalistic editor that leaves you staring at a blank page. Kestrel Write is a full creative engine — a structured, fast, visually intuitive environment that almost feels like Ableton or Logic, but for words instead of waveforms.
And for an industry drowning in noise, pressure, deadlines, and content demand, this could be exactly what artists have been waiting for.
In this in-depth blog, we’ll break down:
-
Why writer’s block is more common than ever
-
What makes Kestrel Write different from every lyric app before it
-
How its DAW-like approach reshapes the writing process
-
Real-world songwriting use cases
-
Why the future of lyric writing might look a lot like music production
Let’s dive in.
Why Writer’s Block Hits Harder Than Ever in 2025
Writer’s block didn’t suddenly appear. Artists have dealt with it since the beginning of time. But the pressure around creativity has changed — dramatically.
Here’s why musicians today struggle more:
1. The Internet Has Accelerated Creative Burnout
We are living in a time where:
-
artists are expected to release music faster
-
the TikTok attention cycle resets every 48 hours
-
content output matters as much as musical quality
That pressure to constantly produce can choke creativity.
2. Most Writing Tools Aren’t Built for Songwriters
Songwriting isn’t linear.
You might start with a hook, jump to a verse, then tweak the pre-chorus. Word processors and note apps force a straight, unstructured format that doesn’t match the songwriter’s actual workflow.
3. Too Many Distractions
The moment you open your phone or browser, your creativity competes against:
-
notifications
-
social feeds
-
endless apps
-
real-world stress
A songwriter might have the spark — but not the environment to shape it.
4. DAWs Help with Production, Not Lyrics
DAWs have revolutionised recording, mixing, production, editing, and arrangement…
…but what about writing lyrics?
This is where traditional tools fail. DAWs are built for audio. Lyric tools are built for typing.
Nothing in the middle existed — until now.
Introducing Kestrel Write: The DAW for Lyricists
Kestrel Write is not just an app. It’s an entire writing environment, designed specifically to replace the messy patchwork of:
-
Notes app
-
Google Docs
-
physical notebooks
-
sticky notes
-
random voice memos
-
half-written ideas lost in email drafts
Instead, Kestrel Write brings that entire ecosystem into a sleek, music-inspired interface built to accelerate the flow of ideas.
The DAW-like Layout
From the moment you open it, you instantly recognise the music-production logic:
-
Sections are treated like tracks
-
Verses and hooks act like clips
-
You can move blocks around like MIDI parts
-
The interface makes structure visible — not hidden inside paragraphs
This visual organisation is massive for creatives. Because lyric writing is not just about words… it’s about structure, energy, storytelling, and pacing. Seeing it laid out like an arrangement helps unlock ideas you didn’t even know were stuck.
Block-Based Lyric Sections
Rather than scrolling through pages of text, Kestrel Write breaks everything into movable blocks:
-
Verse 1
-
Chorus
-
Bridge
-
Pre-chorus
-
Post-chorus
-
Alternate versions
-
Unused lines
-
Scratch ideas
If you’ve ever rearranged song structure in your DAW, this will feel instantly familiar.
Real-Time Idea Libraries
Sometimes you don’t have whole verses — just fragments.
Kestrel Write lets you store:
-
punchlines
-
metaphors
-
rhymes
-
word banks
-
mood notes
-
prompts
-
incomplete hooks
Everything is organised yet instantly accessible within the same workspace.
Inline Recording
Not every lyric starts with text. Sometimes it starts with a melody.
Kestrel Write includes instant audio capture — just like voice memos — but tied to the exact section you’re working on. That means no more guessing which melody belonged to which idea.
This alone could save songwriters hundreds of lost ideas per year.
How Kestrel Write Helps Break Writer’s Block
Writer’s block often isn’t about a lack of creativity.
It’s about friction.
Friction between the mind and the tool.
Friction between the idea and the execution.
Friction between inspiration and workflow.
Kestrel Write is designed to eliminate friction completely.
Here’s how:
1. Structured Creativity
Most lyric apps give you a blank page.
Kestrel Write gives you a song layout.
This instantly removes the pressure of “Where do I start?” Instead, you can drop something into a verse block, a chorus block, or an idea bin. The workspace guides your flow without constraining it.
2. Rapid Rearrangement
Stuck on the second verse? Move the chorus up. Shift the bridge. Duplicate the hook. Try alternate versions.
Songwriting becomes play — not pressure.
3. Visual Storytelling
Seeing your song like a timeline helps you identify:
-
pacing issues
-
repetitive moments
-
missing transitions
-
emotional highs and lows
This unlocks clarity, which unlocks productivity.
4. Instant Capture of Inspiration
Writer’s block often happens because the best ideas arrive at random, and they evaporate quickly.
With Kestrel Write, you can capture:
-
audio
-
short lyrical fragments
-
melody sketches
-
rhythm ideas
…without breaking your flow.
5. Creative Tools (Rhyming, Metaphor, and Prompt Systems)
While it’s not a full AI chatbot, Kestrel Write integrates smart tools like:
-
rhyme suggestions
-
better word alternatives
-
theme prompts
-
phrasing variations
-
pattern suggestions
These tools don’t write for you — they write with you.
Why a DAW-Style Lyric Tool Was Long Overdue
Music production had its revolution decades ago.
Lyric writing is catching up now.
Think about it:
-
Producers have Ableton, Logic, FL Studio, Studio One…
-
Mix engineers have FabFilter, iZotope, Waves…
-
Mastering engineers have AI-assisted software…
-
Video creators have full editing suites…
But lyricists?
They’ve essentially been using text editors — tools no different from 1995.
Kestrel Write finally gives writers a dedicated workspace designed around the creative process of songwriting.
And this evolution was overdue for at least five major reasons:
1. Lyrics Are Becoming More Important in Modern Music
In genres like pop, indie, R&B, grime, Afrobeat, or hip hop…
lyrics drive:
-
TikTok trends
-
emotional connection
-
relatability
-
storytelling
-
hooks that turn into memes or virals
Better lyrics equals better chances of impact.
2. Collaboration Is Global Now
Writers in different countries need a shared workspace.
Google Docs has limits.
Kestrel Write unlocks real-time collaborative songwriting.
3. Music Is More Competitive
Standing out requires precision.
A good workflow becomes a major advantage.
4. Productivity Needs to Match Industry Speed
Labels want faster turnaround.
Independent artists want consistent release calendars.
Tools like Kestrel Write match the pace of today’s industry.
5. Songwriting Should Be Fun
A DAW-like interface makes lyric writing feel like a creative playground — not a homework assignment.
Real-World Use Cases: How Songwriters Can Use Kestrel Write
Here’s how different types of artists can benefit:
1. Pop Songwriters
Pop relies heavily on:
-
catchy hooks
-
strong pre-chorus lift
-
clear structure
The block-based system is perfect for experimenting with multiple chorus drafts, swapping verse ideas, and refining hooks until they click.
2. Rappers
Rappers often write:
-
punchlines
-
flows
-
schemes
-
rhythm patterns
-
multis
The idea vault and rhyme suggestions are game-changers for keeping everything organised.
3. Vocalists Who Start With Melodies
With inline voice recording, they can hum melody ideas into the exact block where they belong, then fill the words later.
4. Producers Who Also Write
Producers can sketch structure visually — just like in a DAW — then align lyrics to specific sections of their beat.
5. Collaborative Teams
Two or more writers can build the entire song together:
-
chorus by one person
-
verses by another
-
bridge by a third
Everything stays clean, synced, and version-controlled.
6. Independent Artists
Indie artists often juggle:
-
writing
-
recording
-
marketing
-
visuals
-
distribution
A structured writing environment saves them enormous time.
The Future of Songwriting: More Tools Like This Will Emerge
Kestrel Write is a glimpse of where the industry is heading:
-
lyric writing workflows becoming more visual
-
more “DAW-inspired” creative tools
-
smart prompts integrated directly into songwriting software
-
hybrid AI + human collaboration
-
centralised workspaces replacing fragmented tools
Songwriting is becoming more professionalised — not just creatively, but technologically.
The process is evolving, and Kestrel Write is one of the first major steps in this new direction.
Final Thoughts: A True Tool for Breaking Writer’s Block
Writer’s block is not a lack of talent.
Not a lack of creativity.
Not a lack of passion.
It’s a workflow problem.
And Kestrel Write solves it in a way no lyric writing app has solved it before:
-
structure
-
clarity
-
organisation
-
creative stimulation
-
DAW-like familiarity
-
zero distractions
-
fast idea capture
-
collaboration
-
visual songwriting
If you’ve ever stared at a blank page for too long…
If you’ve ever lost a great idea because the tools didn’t keep up…
If you’ve ever needed a better system to turn inspiration into finished lyrics…
Kestrel Write might be the breakthrough you’ve been waiting for.
A workspace built for modern creativity.
A writing environment that accelerates idea flow.
A tool designed for the way songwriters actually think.
Writer’s block might never fully disappear — but with tools like Kestrel Write, it no longer has to control the process.
How to Remove Background Noise from Your Vocals Within Seconds Using BandLab’s Voice Cleaner
Written by Sounds Space
How to Remove Background Noise from Your Vocals Within Seconds Using BandLab’s Voice Cleaner
In today’s world, you don’t need a $1,000 microphone or a fully treated vocal booth to record clean, professional-sounding vocals. Whether you’re a singer, rapper, podcaster, voice-over artist, producer, or content creator, crystal-clear vocals can make or break the quality of your final project. Background noise — like fans, cars, room ambience, static, or low-quality mic hiss — can instantly ruin an otherwise great performance.
But thanks to modern AI-powered processing, cleaning your vocals no longer requires expensive plugins or advanced engineering skills. And one of the most impressive tools leading this revolution is BandLab’s Voice Cleaner—a free, instant, browser-based vocal noise remover that takes seconds to use and delivers shockingly good results.
This blog breaks down exactly how BandLab’s Voice Cleaner works, why it’s becoming essential for artists and creators, and how you can use it to remove background noise from your vocals in seconds, even if you’ve never mixed audio before. Let’s dive deep into what makes this tool a game-changer for the modern creator.
Why Clean Vocals Matter More Than Ever
Clean vocals used to be something only professional studios with expensive gear could achieve. Today, with millions of creators recording from their bedrooms, offices, cars, and even outside, background noise has become one of the most common problems.
Dirty vocals affect everything:
🎵 For Singers and Rappers:
-
They reduce the emotional impact of your performance
-
They make your mix muddy
-
They weaken clarity
-
They reveal your recording environment
🎙 For Podcasters and Voice-over Artists:
-
Listeners drop off quickly when audio quality is poor
-
Noise makes speech harder to understand
-
Advertisers expect clean audio
-
Voiceovers must blend seamlessly with production sound
🎮 For Content Creators (YouTube, TikTok, Gaming, Reels):
-
Background noise makes viewers scroll past instantly
-
Poor audio lowers overall production quality
-
It reduces watch time and engagement
In short, noisy vocals instantly make you sound less professional — no matter how great your voice is or how good your microphone might be.
That’s why tools like BandLab’s Voice Cleaner are blowing up: they allow anyone to get studio-quality results without a studio.
What Makes BandLab’s Voice Cleaner Different?
There are plenty of vocal cleaning plugins and apps out there — from Waves NS1, iZotope RX, CrumplePop, Adobe Enhance, Krisp AI, and more. But BandLab’s Voice Cleaner stands out for a few giant reasons:
✔ It’s FREE
You don’t need to pay a subscription, buy a plugin, or sign up for a trial.
✔ It works instantly in your browser
No installations. No DAW required. No complicated setup.
✔ It uses AI specially trained on vocal noise
Not generic noise reduction — vocal-aware processing.
✔ It cleans without destroying your vocal tone
No more robotic, watery, metallic artifacts.
✔ Perfect for beginners and pros
It solves a complicated engineering problem with one click.
✔ It’s fast — literally seconds
Upload your raw vocal → click Voice Cleaner → get results.
This democratizes high-quality audio. Whether you’re using an iPhone mic, USB mic, or laptop mic — the results are shockingly clean.
How to Use BandLab’s Voice Cleaner (Step-by-Step Tutorial)
Below is the exact process to clean your vocals fast:
Step 1 — Record Your Vocal (Anywhere, Any Device)
You can record your vocals:
-
Inside the BandLab mobile app
-
Inside BandLab’s browser DAW
-
In your normal DAW (FL Studio, Logic, Ableton, Pro Tools, Cubase, Studio One)
-
In a voice recorder app
-
On your phone
-
Using a USB mic
-
Using a budget dynamic mic
-
Or even using your laptop’s built-in mic
Voice Cleaner doesn’t care — it works with any vocal file.
Just make sure your vocal is in one of the common formats:
-
WAV
-
MP3
-
M4A
-
AAC
-
FLAC
Step 2 — Upload the Vocal to BandLab
Go to BandLab.com and either:
-
Drag your vocal file into a new Mix Editor project
-
Or click Upload inside the Mix Editor
-
Or use the mobile app to import your file
Once your track appears, select it.
Step 3 — Click “Voice Cleaner”
BandLab will show a menu of effects. One of them is:
🔹 Voice Cleaner
Click it.
This activates BandLab’s AI-powered noise removal algorithm.
Step 4 — Let BandLab Process the Audio
BandLab will take a few seconds to:
-
Analyze your vocal
-
Separate voice from noise
-
Remove hum, hiss, ambience, static, and unwanted room noise
-
Preserve your vocal tone
This is where the tool really shines: the AI focuses specifically on voice, not general noise.
Step 5 — Listen to Your Cleaned Vocal
You instantly get a cleaner, more polished version of your vocal.
You can A/B test:
-
Before
-
After
The difference is usually massive.
Step 6 — Export or Continue Mixing
You now have two options:
Option A — Export the cleaned vocal
You can download the processed file and use it in:
-
FL Studio
-
Logic Pro
-
Ableton Live
-
Studio One
-
Pro Tools
-
Or any DAW
Option B — Continue mixing inside BandLab
BandLab’s Mix Editor includes:
-
EQ
-
Compression
-
AutoPitch (tuning)
-
Effects
-
Reverb
-
Delay
-
Multi-effects racks
So you can turn your clean vocal into a finished mix right inside BandLab.
What Exactly Does Voice Cleaner Remove?
BandLab’s AI is trained to remove the most common types of background noise you hear in amateur recordings:
1. Room Noise
-
Room echo
-
Natural ambience
-
Reflections
-
Reverb from untreated rooms
2. Background Hiss
-
Electronic hum
-
Static
-
Air-conditioning noise
-
Laptop fan sound
-
Power interference
3. Outdoor Noise
-
Cars
-
Wind rumble
-
Distant talking
-
Street ambience
4. Mic Noise
-
Cheap mic distortion
-
Self-noise from budget microphones
-
Handling noise
5. Environmental Sounds
-
Keyboard clicks
-
Mouse clicks
-
Paper rustling
-
Light mechanical noises
It doesn’t just mute them — it separates the vocal from the noise.
How Does the AI Work Behind the Scenes?
BandLab hasn’t released the exact details, but based on the results and behavior, Voice Cleaner is using modern deep-learning speech separation, likely based on techniques similar to:
🧠 Spectral Subtraction
AI identifies unwanted frequencies and subtracts them intelligently.
🧠 Voice Source Separation
The model isolates vocal formants and removes anything that isn't part of the voice.
🧠 Neural Network Upsampling
This helps restore clarity after noise removal.
🧠 Phase Repair and Vocal Reconstruction
To avoid metallic artifacts common in old noise-reduction tools.
This is why Voice Cleaner performs better than many commercial plugins that cost $50–$200.
Real-World Examples: What Voice Cleaner Can Fix Instantly
If any of these situations sound familiar, Voice Cleaner is made for you.
🎤 Case 1 — Recording Vocals in a Bedroom
Your vocal has:
-
Fan noise
-
Room echo
-
Laptop hiss
-
Mild distortion
Voice Cleaner removes nearly all of it.
🎙 Case 2 — Recording with a USB Mic
USB mics can sound thin and noisy.
Voice Cleaner adds clarity and removes harshness.
🎧 Case 3 — Recording with a Phone
Phones capture a lot of ambient noise.
Voice Cleaner isolates your actual voice.
🎮 Case 4 — Voiceovers or YouTube Commentary
Gaming microphones often pick up:
-
Keyboard clicks
-
PC fans
-
Room noise
Voice Cleaner cleans the track immediately.
🎵 Case 5 — Rappers Recording in a Car
This is more common than people think!
Car noise gets eliminated with surprising accuracy.
🎬 Case 6 — Dialogue for Short Films
No budget for lav mics or boom poles?
Voice Cleaner can salvage dialogue recorded in noisy environments.
🎤 Case 7 — Live Freestyle, TikTok, or Reels
Clear vocals = more engagement.
Comparing BandLab Voice Cleaner to Paid Alternatives
Let’s see how it stacks up.
⭐ vs. iZotope RX ($399–$1,199)
RX is more powerful, but complex.
Voice Cleaner gives instant results with no learning curve.
⭐ vs. Waves NS1 ($49)
Voice Cleaner actually removes noise instead of masking it.
⭐ vs. Adobe Enhance Speech (subscription-based)
Similar AI technology — but BandLab is free and faster.
⭐ vs. Krisp AI
Krisp is built for live calls; this is built for music and content creation.
⭐ vs. DAW Built-in Noise Reduction
Most DAW tools use old algorithms.
BandLab’s AI is far more effective.
Overall, BandLab’s Voice Cleaner wins on convenience, speed, clarity, and price (free).
Pro Tips to Get the Cleanest Possible Results
While Voice Cleaner is powerful, you can make your recordings even better with a few simple tricks:
1. Record close to the microphone
Better signal = easier cleanup.
2. Turn off fans or AC if possible
Less noise going in = more clarity coming out.
3. Avoid clipping
Speak or sing at a comfortable level.
4. Use soft furnishings to reduce echo
Curtains, carpets, clothes — anything helps.
5. Mix after cleaning
EQ and compression sound much better when noise is gone.
Why BandLab’s Voice Cleaner Is a Game Changer for Beginners
A beginner doesn’t know:
-
What EQ frequencies to cut
-
How to apply noise gating
-
How to use multiband compression
-
How to remove room reverb
-
How to repair dialogue
Voice Cleaner eliminates the need for technical knowledge.
And for pros?
It speeds up workflow dramatically.
This is why so many creators say the same thing:
"Voice Cleaner is like having a mini-engineer inside BandLab."
The Future of AI Vocal Tools
BandLab is at the forefront of AI in music technology, offering tools like:
-
AutoPitch (vocal tuning)
-
SongStarter
-
Voice Cleaner
-
Mastering algorithms
-
AI-powered presets
-
Instrumental creation tools
Voice Cleaner is part of a larger movement where AI helps creators focus on creativity, not technical barriers.
The future looks like:
-
Real-time AI noise removal
-
AI vocal tone enhancement
-
Automatic mixing
-
Automatic mastering
-
Automatic vocal repair
-
Fully AI-assisted recording environments
Voice Cleaner is just the beginning — but it’s already powerful enough to replace entire plugins.
Final Thoughts: Clean Vocals Are Now Just One Click Away
BandLab’s Voice Cleaner is one of the simplest, most effective, and most accessible noise-reduction tools available today — and the fact that it’s free makes it unbeatable.
You can remove:
-
Room noise
-
Echo
-
Hiss
-
Hum
-
Outdoor ambience
-
Microphone noise
-
Background chatter
…in literally seconds, with one click, using any device, any microphone, and zero engineering skills.
Whether you’re recording music, podcasts, YouTube videos, TikToks, voiceovers, or dialogue, this tool transforms noisy vocals into clean, polished recordings instantly.
If you’ve been struggling with background noise, or if you want professional-sounding vocals without professional gear, BandLab’s Voice Cleaner is one of the easiest wins you’ll ever get.
The best free VST plugins you should grab in December 2025
Written by Sounds Space
The best free VST plugins you should grab in December 2025
Alright, brother — holiday deals aren’t just for shoppers. Developers and big audio companies drop serious freebies around Black Friday / Cyber Monday, and December is officially the month you can rebuild a studio without emptying your wallet. Below, I’ve done the digging and pulled together the freshest, actually-useful free VSTs and limited-time freebies available right now (December 2025). I’ll tell you what they do, why they matter, who should grab them, and any time limits or catch-clauses to watch for. Let’s go.
Quick top picks (TL;DR)
-
Universal Audio — pick-one free UAD plugin (limited promo in late Nov–early Dec). Great chance to score a classic compressor/EQ/etc. If you use UAD.
-
Waves — Magma StressBox (and other Black Friday freebies) — simple, instant shaping.
-
Klevgrand — Degrader / Richter promos (free for certain owners or via Production Expert promotions). Lovely creative tools for lo-fi and texture.
-
Antelope Audio / other vendors — occasional free FX like MG4+ EQ (Black Friday freebies).
-
iZotope Vocal Doubler, Kilohearts Essentials & perennial freebies — reliably useful, widely compatible.
What’s new / why December 2025 is special
Every year big brands and indie devs time giveaways or extended trials around Black Friday/Cyber Monday. In 2025, the pattern continued — companies like Universal Audio, Waves, Antelope, and many indie makers released or made full versions available temporarily for free, while curated lists from plugin blogs and online stores were updated in early December to highlight the best ongoing freebies. That means you can often pick up a plugin that normally costs tens or hundreds of dollars — sometimes permanently — if you claim it while the promo is live.
Important: lots of freebies are time-limited (claim window) or require a tiny commitment (create an account, register hardware, or make a purchase with a coupon). Always read the fine print before clicking “claim.”
In-depth: standout free plugins and promos (what they are, why they matter)
1. Universal Audio — pick one free UAD plugin (limited promo)
If you use UAD hardware or the UAD ecosystem, UA ran a promo allowing users to choose one plugin from a select list (things like a classic 1176 emulation, LA-2A, Pultec-style EQs, etc.). These are studio staples — buttery analog modeling and immediate payoff on vocals, drums, and buses. If the promo is still live when you read this, don’t sleep on it; these plugins normally cost big money and are excellent for finishing and color.
Who should grab it: mixing engineers, home producers who want go-to analog emulations.
Heads up: UA promos sometimes require a UA account and UAD registration. Check expiry dates.
2. Waves — Magma StressBox & other seasonal freebies
Waves continues the Black Friday tradition of releasing single-purpose gems free for a short window. In 2025 one of the freebies getting attention was Magma StressBox, a one-knob shaper for punch, warmth and grit — perfect for drums, synths, and even buses. Waves’ freebies often return in slightly different forms during sales, so claim while available.
Who should grab it: beatmakers, EDM producers, anyone who likes quick coloration.
3. Klevgrand — Degrader, Richter, and indie creative tools
Klevgrand makes unique, musical creative effects. In 202,5 they teamed with hardware makers and sites (Focusrite, Novation, Production Expert) to offer tools like Degrader or Richter for free under specific conditions (ownership of hardware or site redemption). Degrader is a vintage/bit-crush style effect that’s brilliant for lo-fi textures; Richter is a more creative compressor/character tool. These freebies are great because Klevgrand’s UI is minimal, and the sound is musical.
Who should grab it: sound designers and producers who love texture and lo-fi effects.
4. Antelope Audio, AIR, iZotope small gems (free tools)
This year Antelope offered things like the MG4+ EQ as a short-term freebie, and AIR Music Tech and iZotope continued to keep some utility tools free (e.g., iZotope Vocal Doubler, Tape Double-Track type tools). These are practical, low-overhead downloads that can seriously improve a vocal chain or glue a mix.
Who should grab it: vocal producers, anyone wanting quick quality fixes.
5. Kilohearts Essentials & Plugin Boutique curated freebies
Kilohearts’ Essentials pack and curated freebies from Plugin Boutique are perfect for building a toolkit: filters, simple modulation tools, a few solid reverbs and delays. Plugin Boutique’s roundups also highlight community favorites that are free and actually useful (e.g., Zyklop synths and other creative instruments). These lists are great for discovering plugins you might have missed.
Who should grab it: beginners, producers who want a broad toolkit fast.
Best free plugins by category (practical shortlist)
Here’s a quick category breakdown — plugins mentioned below were highlighted across the December 2025 roundups and freebies.
-
Compression / Dynamics: Klevgrand Richter (promo), occasional UA choices (1176/LA-2A models).
-
Saturation / Color: Waves Magma StressBox, Klevgrand Degrader.
-
EQ / Tone: Antelope MG4+ EQ (promo), Pultec-style options via UA promo.
-
Vocal tools: iZotope Vocal Doubler (always handy), AIR Tape Double-Track (promo).
-
Instruments / Synths: Zyklop and other Plugin Boutique free picks — good for pads/evolving textures.
-
Bundles / Collections: Kilohearts Essentials, Plugin Boutique freebie lists (great for building a suite).
How to claim the freebies — practical checklist
-
Act fast but read terms — some freebies are only claimable for a few days. Bookmark the deal and redeem it immediately if you want it. (Black Friday promos in 2025 mostly ran between late Nov and early Dec.)
-
Create accounts — many promos require a vendor account (UA, Waves, Plugin Boutique). Use an email you control.
-
Check compatibility — VST2/VST3/AU/AAX support differs. If you use a specific DAW, confirm plugin formats.
-
Watch for hardware-locked offers — some freebies require owning specific hardware (Focusrite/Novation + Klevgrand offer). If you qualify, redeem the license.
-
Install safely — download from official vendor pages or reputable resellers/blogs (BedroomProducersBlog, MusicRadar, Plugin Boutique). Avoid shady mirrors.
Tips for integrating freebies into real projects
-
Use freebies as color, not crutches. Free distortion or saturation plugins can give an instant vibe; pair them with EQ to avoid muddying mixes.
-
Treat a free compressor like a character — not a cure-all. Vintage emulations add flavor; use them on buses or vocals where character helps the mix.
-
Keep a “freebies” folder in your plugin manager to quickly A/B new tools in context.
-
Document presets you love. When a freebie disappears or is updated, you’ll want to recreate the signature settings you rely on.
Where to watch for ongoing and future freebies
These websites are great for tracking freebies and limited promos:
-
MusicRadar / AudioTechTV — timely roundups and Cyber Monday live posts.
-
BedroomProducersBlog — excellent chronicling of Black Friday freebies and indie deals.
-
Plugin Boutique — curated free picks and occasional “claim with purchase” offers.
-
Developer sites (Klevgrand, Waves, UA) — the source of truth for redemption windows and installers.
Final thoughts, what I’d grab first (my personal short list for December 2025)
-
If the UAD pick promo is still open and you use UAD, claim a classic compressor/EQ. It’s a permanent quality jump for mixes.
-
Claim Waves Magma StressBox for instant glue/grit for drums and synths.
-
If you own a Focusrite/Novation product or qualify for the Klevgrand promo, grab Degrader — the creative textures are gold for lo-fi and cinematic sounds.
-
Snag iZotope Vocal Doubler and Kilohearts Essentials if you’re building a practical toolkit fast.
Quick legal & safe download reminder
Only download installers and license files from official vendor pages or trusted stores. Avoid “warez” or unofficial installers — those can contain malware and also deprive developers of income. Most promotions require you to create a legitimate account and claim a license; that license will be tied to your user account, so don’t lose access to it.
More...
The Final Cyber Monday Sound-Upgrade: Top VST & Gear Deals You Shouldn’t Miss
Written by Sounds Space
🎶 The Final Cyber Monday Sound-Upgrade: Top VST & Gear Deals You Shouldn’t Miss
Cyber Monday (and its Black Friday run-up) has always been a sacred ritual for music producers, that special moment when premium plugins, virtual synths, DAWs, FX suites, and studio hardware go on sale at historically low prices. For 2025, many of these offers are still live, but word is: time’s running out. If you’ve been holding off pulling the trigger, whether because of budget, indecision, or wanting to wait for the “perfect bundle” — now’s the moment to act.
Whether you’re crafting Tech House bangers like your upcoming “Subaholic’s – Chicago Town,” exploring ambient textures, mastering mixes, or building a full studio from scratch, this could be your last chance to grab serious gear without breaking the bank.
In this post, I’ll walk you through the top plugin deals, synth/DAW/hardware bargains, and then show you how to build a starter, pro, and “maxed-out” production kit — tailored for a house / electronic / club-style producer.
🔊 Why This Cyber Monday Matters (More Than Ever)
-
According to current roundups, many of the biggest plugin bundles from elite brands are discounted by 50 % to 90 % — some even offered at deep-bundle pricing that would cost hundreds or thousands of dollars when bought individually.
-
These savings cover virtually everything a modern producer might need — from classic analogue-style synth emulations and vintage FX suites to cutting-edge vocal tools, distortion boxes, mastering plugins, and sample libraries.
-
In 2025, many of these offers are set to end within days — so procrastination could cost more than just missing a good price.
Given your background — interest in synths & plugins (you mentioned things like Serum 2, Waves Curve, El Chapo 2 synth) and a focus on electronic / Tech House — this is pretty much a golden window to strengthen your toolbox.
🎛️ Best VST Plugins & Software Deals You Should Be Checking Out Now
Here are some of the top VST / DAW / plugin-bundle deals still live — especially relevant for producers, sound-designers, and mixing/mastering people.
-
u‑he Diva — In many 2025 sales, Diva is discounted by over 50%, making it an affordable gateway to lush, analogue-style synth sounds that emulate vintage synth hardware.
-
Arturia V Collection 11 Pro & Arturia FX Collection 5 — Both are seeing 50%-off pricing in major sales. The V Collection packs dozens of classic synths/keyboards, and the FX Collection gives you vintage-styled effects, compressors, reverbs, modulation FX — useful for mixing, sound design, or giving tracks character.
-
Waves Platinum Bundle (and the broader Waves catalog) — Waves deals remain among the most consistent each Cyber Season. Their bundles often drop drastically in price, and you get access to hundreds of plugins (EQ, compression, reverb, guitar rig, vocal processing, mastering tools).
-
All-in-one / “super-bundles” like Plugin Boutique $69 Bundle — These kinds of mega-bundles offer dozens of instruments, effects, samples, and presets from multiple respected developers for a tiny fraction of their individual price sum. For many producers, this is the most efficient way to build a rapidly diverse toolkit without overspending.
-
Mixing / Mastering Boost Tools like UrsaDSP Boost — Good limiter / dynamics-processing tools are often overlooked by producers focused on synths and melodies — but they’re essential for giving your track that final polish and punch. Discounted plugins like Boost make mastering-quality tools more accessible. (A trend observed in several 2025 sales cycles.)
🎹 Synths, DAWs & Hardware Under the Radar (Still Worth It)
While plugins dominate the bargain lists, there are also synths, controllers, and hardware tools slipping under many radars — and for producers who like to play live, sketch ideas by hand, or combine analogue/digital workflow, these can be lovely additions.
-
Compact MIDI keyboard controllers are heavily discounted this year — for example, Akai MPK Mini MK3 — extremely useful if you want to sketch chords, melodies or basslines quickly, or work on the go.
-
If you prefer building beats manually or want hands-on control over drums and sequencing, a good controller + plugin setup often gives more flexibility than touching the mouse all night.
-
Many deals combine software + hardware bundles (plug-in suite + controller + presets) — giving you a “studio-starter package” at a fraction of regular cost.
🧰 Build-Your-Own Bundle: Starter / Pro / Maxed-Out Kits (By Budget + Purpose)
Given your style and ambitions (electronic/Tech House, creative plugin use, maybe live sets), I put together three hypothetical “kits.” You can mix & match — but each is optimised for different budgets and creative needs.
✅ Budget-Friendly Starter Kit (~£150-£250)
Good if you’re building tools from scratch without spending too much — perfect for songwriting, sketching ideas, making demos, or releasing minimal tracks.


-
Akai MPK Mini MK3 — portable, hands-on MIDI controller, ideal for melodies, chords, basslines, and live tweaking.
-
u-he Diva — legendary synth VST with great analog emulations; perfect for warm basses, pads, and classic synth tones.
-
UrsaDSP Boost — a transparent limiter/dynamics tool to polish mixes and increase loudness without distortion.
-
The ALL Bundle (from Plugin Boutique) — a bargain-priced bundle packing a variety of synths, effects, presets and sound tools — great to stock up on creative options.
This setup gives you a full production chain: you can compose, synthesise, mix, and master — all without spending a ton.
🎛️ Pro-Level Production Kit (~£400-£700)
For those serious about professional-sounding tracks, layering sounds, deeper sound design, mixing and mastering, and building your own unique sonic signature.


-
Waves Platinum Bundle — a huge collection of mixing, mastering, FX, guitar rigs, vocal processors, spatial tools — everything you need to make club-grade, broadcast-ready tracks.
-
IK Multimedia Total Studio 5 Max — a complete software suite giving you synths, samplers, effects, mixing tools — cover to cover for many production tasks.
-
Akai MPK Mini IV — a slightly more advanced MIDI controller with extra features, ideal for performance, live tweaking, or deeper production sessions.
-
Mix DRUMS Plugin — handy for tightening and shaping drums, giving them punch and impact — essential for electronic/house productions where drums drive the groove.
With this kit, you get robust creative power, mixing/mastering quality, and flexibility — from initial idea to finished track.
🔥 “Studio Maxed-Out” Power Kit (~£800-£1500+)
For producers aiming to release professionally, do mixes that stand out, experiment with sound design, or even perform live. This kit blends depth, flexibility, and high-end polish.


-
Waves Ultimate Audio Plugins — complete access to 240+ Waves plugins, covering every effect, instrument, and processing tool — unmatched breadth for any studio.
-
u-he Diva — as before, but in a serious production context; versatility matters more when you layer, modulate, and sculpt sound heavily.
-
IK Multimedia Total Studio 5 Max — the core backbone of your production setup; synths, sampling, effects, mixing / mastering tools all in one.
-
Akai MPK Mini IV — creative control, hands-on production, live-performance readiness.
-
UrsaDSP Boost — final mastering polish, level control, professional loudness without sacrificing clarity.
-
The ALL Bundle — extra creative payload: sounds, presets, FX, samples — use as inspiration or finishing touches for genres, vibes, transitions, FX, etc.
With this kit, you’re essentially running a full studio — you can produce, mix, master, sound-design, and perform. Tracks made here can go straight to release without needing much more.
🎯 What to Focus on (Given Your Background / Style)
Since you produce Tech House / electronic music and care about creative sound design, here’s how I’d prioritize gear if I were you:
-
Synth plugins & flexible sound design tools: Tools like Diva or a full bundle of synth/effects give you huge freedom. Great for pads, basses, stabs, atmospheres — all critical for Tech House or house-style grooves.
-
Drum & mixing tools: Plugins for drums (compression, saturation, drum-designed FX) and mastering plugins help your tracks hit hard in clubs or streaming — punch and polish matter.
-
MIDI controller: Very useful for fast workflow, experimenting with chords, bass, sequencing without always resorting to mouse-clicking. It adds an organic feel and speed to your workflow.
-
A broad plugin bundle: A well-priced bundle gives you multiple genres and sound-design possibilities — very useful when exploring new styles or experimenting beyond your usual Tech House sound.
Especially right now — with deals still active — you have a rare opportunity to build a versatile, powerful setup without needing the budget of a full studio.
⚠️ Tips Before You Click “Buy”
-
Check compatibility — Make sure the plugins and tools work on your DAW / OS (VST/AU compatibility, etc.).
-
Watch for bundle overlap — If you’re buying a big bundle (e.g. Waves Ultimate, IK Total Studio) and then a smaller plugin pack with similar content, you may end up buying duplicates.
-
Don’t just buy for the price — buy for need: If you already have a few synths but lack mixing / mastering tools, prioritise plugins that fill the gaps in your workflow.
-
Think long-term: Invest in tools that offer versatility — a good synth or mastering plugin can be used for many projects over the years.
-
Check license terms — Some deals might be time-limited upgrades, subscription-based, or require registration. Always read the terms when buying bundles at a heavy discount.
🧨 My Recommendation If I Were You, Here’s What I’d Grab Right Now
If I were you (given that you want to grow your music production, produce Tech House, maybe release tracks soon), I’d go for the “Pro-Level Production Kit” now — snag the Waves Platinum Bundle, IK Multimedia Total Studio 5 Max, a good MIDI controller, and some drum-mixing or mastering plugins.
Why: it gives me flexibility, creative power, and polish — enough to produce professional-sounding tracks without needing a massive budget. And if I paired that with good sound design and mixing discipline, I could take “Subaholic's – Chicago Town” or any future track from demo → release-ready.
That said, even the budget starter kit is extremely tempting for newcomers or side projects. If you just want to sketch beats, experiment, or draft tracks while working on other projects (like your work with Diverse Beats or marketing campaigns), that kit gives high value per pound.
🎯 Final Thoughts — Why Now Is the Time to Invest
Deals this big, from top-tier plugin makers and hardware retailers, don’t come around often. For many producers, 2025’s Cyber Monday may be the lowest-possible price window they’ll see for years.
For you — with interests across music production (plugins, synths), digital marketing, content creation, and release plans — this could be the turning point. By grabbing a solid toolkit now, you set yourself up not just for one track but for years of creative output, smoother production, and more professional releases.
Don’t overthink it — but do think smart. Prioritise what fits your style and upcoming projects.
If you like, I can build 2 or 3 custom bundle suggestions for you (based on your current known gear/wishes for synths like Serum, Waves, etc.) so you get a completely tailored “producer starter kit”.
📅 Quick Reminder — Deals Expire Soon
Many of the 2025 deals (plugins, bundles, synth discounts) are reported to end within the first week of December.
If you’ve been hesitating — now’s the time. Once the clock hits the deadline, you may never get the same price for these tools again.
So, if you’re feeling that spark of inspiration (and I know you are), better stack up your production arsenal now and hit the studio while the deals still burn. 🔥
AIR Music Tech’s Tape Double Track Is Free for a Limited Time And It Might Be the Most Exciting Freebie of the Year
Written by Sounds Space
AIR Music Tech’s Tape Double Track Is Free for a Limited Time — And It Might Be the Most Exciting Freebie of the Year
In a year overflowing with soft synth updates, AI-powered production tools, and endless waves of “vintage-modelled” plugins, it’s rare that something lands in the music-producer world that instantly becomes a must-download. But AIR Music Tech has done exactly that with the limited-time free release of Tape Double Track, a modern take on analog tape doubling that takes a beloved classic technique and transforms it into something far more flexible, creative, and mix-ready.
At first glance, Tape Double Track looks like a tape-machine-inspired modulation and doubling tool. But spend even a few minutes with it and you quickly realise this thing is way deeper than that. AIR has effectively built an entire micro-ecosystem of tape coloration, movement, stereo enhancement, time-based modulation, and harmonic thickening into a single interface. It can behave like classic ADT, vintage flanging, slapback tape delay, chorusing, widening, or subtle tone-warming — all depending on how you drive it.
And the best part? For now, it’s completely free.
In this blog, we’ll break down what makes Tape Double Track such a powerful plugin, how it works, what each section does, and why, in a world crowded with freebies, this is the one plugin every producer should grab before the offer disappears.
The Legacy of Double Tracking — And Why It Still Matters Today
Before diving into the plugin itself, it’s worth remembering the history behind the technique. Double tracking, especially its iconic “Artificial Double Tracking” (ADT) variant, is one of the most famous studio tricks in recording history.
It was introduced in the 1960s at Abbey Road Studios, where engineers needed a way to recreate the sound of manually doubling vocals without forcing artists — particularly John Lennon — to record takes twice. Their solution was brilliant: create a second tape machine running slightly out of sync with the first. This natural timing drift created a rich, wide, organic doubling effect that sounded smoother and more musical than standard modulation.
Since then, ADT-style tape doubling has become a staple of rock, pop, R&B, EDM, and even hip-hop vocals. It thickens leads, adds dimension, and creates stereo space without sounding artificial.
AIR’s Tape Double Track builds on this heritage — but gives producers 2025-level control.
A First Look at the Interface: Modern Power, Classic Tape Aesthetics
The interface shown in the image captures exactly the vibe AIR is aiming for — a machine that feels analog but behaves like a modern digital powerhouse.
At the centre is a large VariSpeed control, flanked by two reel-like displays representing the source and doubled signal. Surrounding these are hands-on knobs for drive, tone shaping, speed, sync, wobble, warp, modulation, and more.
Every section has detailed control, but nothing feels overwhelming. The UI keeps the vintage tape aesthetic — large dials, chunky knobs, warm lighting — while offering features no real tape machine would ever allow.
This balance between analog feel and digital precision is a big part of what makes Tape Double Track so appealing. It’s nostalgic without being limited.
The Core Engine: VariSpeed and Time Drift
At the heart of the plugin lies the VariSpeed engine, which recreates the micro-timing drift that made classic ADT so magical.
Unlike simple chorus or delay plugins, Tape Double Track simulates the movement of a physical tape transport. The pitch, timing, and phase drift are not purely mathematical — they’re designed to feel organic, with subtle randomness and imperfections.
This means:
-
Vocals get thicker without sounding overly modulated.
-
Guitars gain width without turning psychedelic unless you want them to.
-
Synths gain movement that feels alive rather than mechanical.
-
Drums can be given weight without losing punch.
The Range control in the middle lets you set exactly how far the timing variations move. Small ranges give subtle width. Large ranges create experimental, dramatic textures.
This engine is also responsible for some of Tape Double Track’s hidden power — the ability to morph into chorus, flanger, slapback, and other effects simply by adjusting speed, sync, and modulation.
Dual Channel Design: Source + Double
The plugin is built around two independent channels — the Source and the Double — each with its own:
-
Pan
-
Drive
-
Tone
-
Monitor
-
Bass Mono switch
This dual-channel system gives you true mixing-style control over your doubled sound.
Want a classic left-right double? Spread the pan knobs and lower the drive on the double channel.
Want more grit and attitude on your double? Crank the drive on channel B.
Want to keep the low end anchored? Use Bass Mono to maintain centre stability.
Want a parallel blend? Solo the double channel and mix like a send effect.
This flexibility is a massive advantage over many simple ADT plugins, which only allow a wet/dry mix. Tape Double Track acts like a full stereo processing rig.
Tracking Section: Speed, Sync, Randomization, and More
The Tracking panel is where Tape Double Track becomes more than just a doubler — it becomes a creative movement processor.
Key controls include:
Speed
This sets how fast the tape drifts moves. Slow speeds yield gentle chorus-like widening. Faster speeds produce deep modulation reminiscent of tape flanging or vibrato.
Sync
When enabled, the tape modulation locks to your project tempo. Perfect for producers who want rhythmic consistency in electronic, trap, house, or techno tracks.
Randomize Heads
This mimics the way old machines would sometimes vary unpredictably. It introduces subtle (or extreme) randomness that keeps the sound alive.
Head Position
This adjusts the starting alignment of the tape heads — a small but incredibly powerful detail that can completely change the stereo feel.
Mode (Manual/Auto)
Manual mode gives you engineering-level control over every parameter. Auto mode keeps movement smooth and musical without deep tweaking.
The Tracking section alone feels like a full modulation plugin baked into the doubler.
Modulation Section: Shape Your Movement
The MOD section lets you choose waveforms for the tape drift’s movement:
-
Sine – smooth and natural
-
Tri – more mechanical, classic modulation
-
Rnd – unpredictable and tape-like
Combined with the warp, speed, and sync settings, this gives thousands of possible movement behaviours.
For more experimental producers, this opens doors to new textures:
-
Broken VHS-style chorus
-
Tape flanging that rises and falls irregularly
-
Dirty wobble effects are great for lofi
-
Subtle pitch wander is ideal for synth pads
-
Phasey vocal movement reminiscent of early Beatles mixes
And for mixers, you can keep it subtle — adding gentle motion that makes instruments feel less static.
Warp, Wobble, Wear: The Tape Coloration Arsenal
AIR didn’t just replicate tape timing drift — they gave us full control over tape coloration too.
Wobble
Simulates imperfections in the tape transport. Great for lo-fi, vintage, indie, and ambient production styles.
Warp
Adds subtle nonlinear distortion and tape bending effects.
Wear
Gives the sound an aged, softened character that removes harshness and adds warmth.
Together, these controls let you create everything from pristine modern doubles to crusty 1970s reel-to-reel textures.
Bass Mono and Stereo Imaging
The Bass Mono switch is an underrated but extremely important feature.
When doubling anything with low-end vocals, basses, guitars, and synths, spreading the low frequencies can cause the mix to lose impact. Bass Mono keeps everything below a certain threshold centred, while the tape-processed harmonics spread around it.
This means you can widen vocals or synths without compromising club-ready mono compatibility.
The stereo/mono switches on each channel allow even more precise imaging — from ultra-wide ADT to tight mono summing for coloration only.
Practical Uses: Where Tape Double Track Shines
1. Vocals
This is the plugin’s signature use case.
-
Add thickness to leads
-
Create an ADT for pop, rock, and hip-hop
-
Widen choruses without sounding artificial
-
Add subtle tape colour to dull recordings
Whether you’re after Billie Eilish-style tight doubles or classic Beatles-style tape widening, this plugin can achieve it.
2. Guitars
Electric guitars instantly gain width, saturation, and dimension.
Great for:
-
Indie rock
-
Clean funk guitars
-
Wide chorus tones
-
Textured ambient layers
3. Synths
Pads, plucks, and even leads benefit massively.
The movement feels alive and warm, never sterile.
4. Drums
Use sparingly, but when applied to:
-
Overheads
-
Perc loops
-
Breakbeats
-
Room mics
…it adds vintage character that blends into modern mixes perfectly.
5. Sound Design
With extreme warp, wear, and modulation settings, Tape Double Track can become a:
-
Broken tape simulator
-
Analog chorus
-
Lofi engine
-
Vibrato tool
-
Flanger
-
Phase movement box
This versatility is one reason producers are calling it one of AIR’s best free plugins ever.
Why This Free Plugin Stands Out in 2025
Every year, we get a flood of free plugins — compressors, EQs, meter tools, creative FX. But Tape Double Track stands out for several reasons:
1. It replaces multiple plugins.
Instead of needing:
-
Chorus
-
Doubler
-
Tape saturation
-
Modulation
-
Stereo widener
-
Vibrato/flanger
…Tape Double Track can cover all those roles depending on the settings.
2. It’s musical, not mathematical.
The movement feels human, not synthetic.
3. It works across genres.
Pop, R&B, trap, techno, rock, lofi, EDM, indie — everything benefits.
4. It elevates both beginners and pros.
The presets make it easy.
The deep settings make it powerful.
5. It’s free.
Hard to beat that.
Final Thoughts: Get Tape Double Track Before It’s Gone
AIR Music Tech has delivered a plugin that captures the soul of classic tape double tracking while pushing the concept far beyond its origins. The blend of analog imperfection and digital control creates a tool that is both inspiring and practical — something every producer, regardless of genre, can benefit from.
Whether you use it as a subtle thickener, a creative movement processor, a tone-shaping unit, or an experimental modulation engine, Tape Double Track is one of those rare freebies that actually feels like a flagship release.
If you see this offer available, don’t hesitate. Load it into your DAW, throw it on your vocals, and prepare to hear your mixes instantly come to life.
Waves’ secret free plugin revealed: Here’s how to energise your tracks with the new Magma StressBox
Written by Sounds Space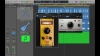
Waves’ secret free plugin revealed: Here’s how to energise your tracks with the new Magma StressBox
Flat mixes are a vibe killer. You can have great arrangement, killer sounds, and still feel like something’s missing — that last 10–20% of life and movement that takes a loop from “nice” to “unforgettable.” Waves’ newly released Magma StressBox aims squarely at that problem: a compact, immediate dynamics tool designed to inject tension, punch, and emotional lift into any track — and for a limited time, it’s free as Waves’ Black Friday offering.
In this post, I’ll break down what Magma StressBox actually does, why it works so well on everything from drums to vocals, creative ways to use it in your mixes and arrangements, and a few quick workflow tips so you can start energising tracks today.
What is Magma StressBox in one sentence?
Magma StressBox is a single-knob dynamics tool that shapes the musical tension and feel of a sound in real time — from subtle, intimate enhancement to aggressive, punchy compression and forward energy. It’s designed to be fast to use and musically effective on a wide range of sources.
The design philosophy: one knob, huge impact
There’s a long tradition of “one-knob” processors that do the heavy lifting without forcing you to become an expert in attack/release curves and side-chain routing. Magma follows that family but with modern sophistication — it’s not just a simple compressor. According to Waves, the control is engineered to pull more than level: it can add perceived room-presence, aggression, or a sense of “coming forward” in the stereo image, and it responds musically to program material so automation becomes expressive and simple.
Why this is smart: producers and beatmakers are juggling dozens of instruments and deadlines. A single, powerful control that reliably adds tension and lift becomes a superpower. You can automate the knob across a verse-to-chorus change to create instant movement, or nudge a drum buss a little to add punch without reprogramming the whole drum chain.
Core features you’ll actually use
Here are the practical things Magma StressBox brings to the table:
-
Single expressive control — turn left for a softer, expanding feel; turn right for aggressive compression and punch. That one knob translates to a complex internal algorithm that blends dynamics, transient shaping, and character.
-
Analogue-style character without being a saturator — Waves notes the plugin carries the “Magma” signature sound: analog-inspired warmth, texture, and coloration that reacts musically. It’s not purely a saturator — it’s a dynamics + character tool.
-
Automation-friendly — because the control maps to musical tension, riding the knob automates song energy naturally (great for builds, drops, and transitioning between sections).
-
Cross-platform formats — available for macOS and Windows in VST3, AU, and AAX formats, so it plays nice in virtually any DAW.
-
Limited-time free option — Waves offered Magma StressBox for free as their Black Friday plugin giveaway, making it easy to test in real projects. (After the offer, it’s positioned at a paid price; check Waves for current pricing.)
Where Magma shines practical use cases
1. Drum buss (instant punch)
Place Magma on the drum buss and slowly turn the knob right until the hits feel tighter and the transient becomes more aggressive. Unlike traditional compressors that can squash dynamics, Magma is designed to bring the room forward and add urgency — ideal for EDM drops, hip-hop drums, or any track that needs immediate drive.
2. Individual drums (snare, kick)
On a snare, small positive turns emphasize crack and sustain; on the kick, you can make the beater snap without losing low-end. Because the plugin reacts to program material, it often needs just a nudge.
3. Vocals (emotion & presence)
Automate Magma across a vocal performance: ease it in for intimate verses, crank a touch for pre-chorus lift, then back off when you want vulnerability. The plugin’s character helps vocals sit front and center without sounding hyper-compressed.
4. Buses and stems (mix glue + excitement)
Use Magma on a synth pad or instrument bus to introduce tension during transitions. It’s great for adding contrast between sections: a subtle turn creates a swelling intimacy, while a stronger setting adds grit and pushes the part forward.
5. Parallel processing
Try it on a send/return channel to blend the processed “stressed” sound under the clean track. This lets you keep dynamics intact while borrowing energy and texture from the processed signal.
Creative tricks and advanced workflows
-
Sidechain-like automation without routing: Instead of routing for sidechain, automate Magma in time with kick hits or drops for a similar pumping/ducking feel but with tonal character added.
-
Parallel widen with mid/side: Put Magma on the mid bus to tighten center elements while keeping side information cleaner, or do the reverse to push side energy for bigger stereo impact.
-
Combine with transient shapers: Use a transient shaper before Magma to emphasize transients, then use Magma for the glue and color — this can produce huge, modern-sounding drums.
-
Use on instrument groups for arrangement dynamics: Automate the knob on a guitar or synth bus to sculpt builds and break sections — quick automation goes a long way.
-
Rescue dull stems: Low-energy stems can often be revived by small positive boosts of Magma; sometimes it’s the fastest fix to make a part sit in the mix.
A/B test: when to use it and when not to
Magma is brilliant when you need quick, musical energy changes. It’s particularly useful on electronic and pop productions where impact and forwardness are prized. However, if you’re after surgical dynamic control (precise threshold and ratio adjustments) or transparent mastering limiting, Magma isn’t a replacement for a dedicated compressor or limiter — it’s a creative dynamics and coloration tool. Use it as a musical enhancer, not as the final loudness crutch.
Real-world examples (what to try right away)
-
Kick + Snare: Immediately put Magma on your drum buss and automate a gentle increase during the chorus. Compare before/after — you’ll hear the difference in perceived punch and room.
-
Vocal Automate: Automate +3 to +6 dB of perceived presence for choruses. Not only will the vocal sit in the mix, it will also feel more emotional.
-
Build transitions: For an 8-bar build, slowly increase Magma on synths and percussion; at the drop, slam it right and then back off to create tension and release.
The bottom line
Waves’ Magma StressBox is one of those tools that can change how you approach energy in a mix. It’s not a one-size-fits-all cure, but when used tastefully, it delivers instant, musical punch and lift with minimal fuss. For producers who want fast, musical results and powerful automation options, Magma is a creative shortcut worth trying.
If you missed the Black Friday free window, keep an eye on Waves deals — they often run promotions and the plugin sits comfortably in a price tier that makes it a practical purchase if you end up loving it.
At $69, Cherry Audio’s Mercury-8 is looking like a very impressive Jupiter-8 emulation
Written by Sounds Space
The Roland Jupiter-8 is one of the most treasured polysynths in history — lush, bold, and instantly recognizable across decades of pop, synth-pop, and film scoring. For decades, producers chasing that classic “8’s” shimmer have had to choose between pricey hardware (if you could even find one), expensive boutique reissues or software that captured varying degrees of the Jupiter-8’s tone and behavior. Enter Cherry Audio’s Mercury-8: a software instrument launched late November 2025 that aims squarely at the Jupiter-8 sound and, at an introductory (and headline-grabbing) price of $69, threatens to upset the emulation market. Here’s why Mercury-8 is worth paying attention to — and why $69 suddenly looks like one of the best value propositions in virtual synths this year.
What Mercury-8 is (and how it approaches the Jupiter-8 legacy)
Cherry Audio markets Mercury-8 as “the ultimate emulation of the legendary Jupiter-8,” and the marketing isn’t just hype: the engine models two independent layers, each with their own oscillators, filters, modulation and effects, mirroring the original synth’s dual-layer architecture while extending it in modern ways. The company has pulled in program-level details (oscillator sync, cross-modulation, switchable filter slopes, etc.) that are central to the Jupiter sound, then added features that hardware couldn’t offer — higher polyphony, deeper modulation routing and integrated effects — to make the instrument both authentic and flexible for contemporary production workflows.
The Mercury-8 engine is built around two full layers capable of being stacked, split or independently processed — which opens up dense, modern pad textures and complex split patches without any external routing tricks. That’s one way Mercury-8 “goes beyond” the original: while the vintage Jupiter-8 had a glorious but finite hardware architecture, Mercury-8 uses digital horsepower to make those classic voices bigger and easier to manipulate inside a DAW. Early hands-on coverage and first impressions have highlighted how close the front panel layout and signal flow feel to the original design, making it intuitive for synth programmers who love the Jupiter workflow but also want the convenience of presets, automation and DAW recall.
The headline: price and value
If you’re used to flagships like Roland Cloud’s official Jupiter-8 emulation or Arturia’s JUP-8V, you know these are usually priced well above the casual impulse purchase threshold; they come with premium price tags that reflect development cost and licensing or brand positioning. Cherry Audio launching Mercury-8 for $69 (and often bundled into promotional deals) is notable because it places a high-quality Jupiter-style emulation within reach of a much wider audience — students, bedroom producers and anyone who wants instant access to those iconic sounds without breaking the bank. For many, that price alone is revolutionary: it democratizes access to a sound palette that used to be gatekept by scarcity and cost.
But cheap doesn’t have to mean shallow. Cherry Audio has a long history of delivering affordable instruments with convincing analog character; Mercury-8 follows that heritage by packing a long list of modern conveniences — multiple effects, deep modulation, preset banks and advanced layering — into a compact, CPU-friendly plug-in. For $69, you get not just a Jupiter vibe, but a workhorse polysynth that can actually compete with pricier alternatives in day-to-day production. Early reviews and forum chatter reflect the same surprise: plenty of people expected a lightweight emulation for the price, but instead found a robust synth engine suitable for professional projects.
How Mercury-8 sounds — fidelity vs. character
Emulation quality is always judged on two axes: fidelity (how closely the software reproduces the original’s quirks and tone) and character (whether the instrument brings its own personality to the table). Based on hands-on first looks and early reviews, Mercury-8 scores highly on both. It models the vintage dual-VCO tone and can reproduce classic JP-8 elements like the punchy sawtooth/triangle textures, the fat unison stacks and the creamy, resonant low-pass filters — while also delivering modern sound shaping that the original hardware could not have provided. The result is an emulation that can feel convincingly “vintage” when you want, or strikingly modern when you exploit the extra polyphony, effects and modulation depth.
Crucially, early testers point out that the UI encourages the same hands-on approach Jupiter-8 programmers loved: oscillators and filters are front and center, with immediate access to modulation and voice stacking. That tactile programming workflow matters — emulations that bury parameters behind menus lose that creative immediacy. Mercury-8 keeps the crucial knobs where your muscle memory expects them, and it supplements them with DAW-friendly conveniences such as preset management and MIDI mapping.
Features that matter and where Mercury-8 goes further
Beyond the core sound engine, Mercury-8 ships with a host of modern features that make it a practical studio tool:
• Expanded polyphony and true dual-layer stacking for massive unison and pad textures.
• Oscillator sync, cross-modulation and vintage-style LFOs for classic JP modulation behaviors.
• Multiple built-in effects (chorus, phaser, delay, reverb and more) so you can get polished sounds without bus processing.
• Deep preset banks and a robust factory library — Cherry Audio bundles a large number of ready-to-use patches covering leads, basses, pads, polys and textures.
• Performance features like split/stack modes, expressive modulation, and straightforward DAW automation.
Those extras position Mercury-8 not just as a faithful historical recreation, but as a modern instrument producers will reach for when they need big analogue-style sounds without routing a vintage synth through racks of external processing.
How it stacks up against the big names
There are already several respected Jupiter-8 emulations on the market: Arturia’s JUP-8 V (and its presence in the V Collection), Roland Cloud’s official JP-8 modeling, TAL-U-No-62/J8 recreate aspects, and boutique analog emulators like u-he’s Diva, leaning into circuit-level character. Historically, the tradeoffs have been price vs. authenticity vs. workflow:
• Roland Cloud typically brings official branding and meticulous modeling.
• Arturia emphasises sound design flexibility and polish.
• u-he and boutique developers chase circuit-level warmth and idiosyncrasy, sometimes at the cost of CPU.
Cherry Audio’s Mercury-8 undercuts many of these on price while matching or surpassing them on practical features like preset variety, effects and modern layering options. For anyone not wedded to owning the “official” Roland model, Mercury-8 offers a compelling mix of authenticity and convenience for a fraction of the cost. That doesn’t mean it will perfectly imitate every micro-quirk of the original hardware — absolute circuit-level devotees may still prefer Roland’s ACB approach or very expensive boutique modeling — but it closes the gap enough that the user experience and usable sound in a mix are where Mercury-8 shines.
BUY MERCURY 8 ON SOUNDS SPACE
Who should buy Mercury-8?
If you fall into one of these groups, Mercury-8 deserves a spot on your short list:
• Bedroom producers and beatmakers who want Jupiter-8 style pads, brass stabs or strings without a big price tag.
• Film and TV composers who need lush, reliable analog polysynth tones that are easy to recall and automate in sessions.
• Sound designers who value the dual-layer architecture and want to experiment with splits, stacks, and dense modulation.
• Educators and students who want a real-sounding polysynth to teach programming and synthesis techniques without burning course budgets.
For studio owners and pro engineers who already own the Roland Cloud or Arturia versions, Mercury-8 still makes sense as a creative second voice: its different modulation and effects combinations can yield distinct takes on classic patches, and having multiple emulations increases the palette you can draw from during sessions.
Caveats and what to test in a demo
A few sensible caveats to remember: emulations will always differ from hardware in subtle ways (component tolerances, power supply variability, aging components, etc.). If you’re chasing an exact, component-level match for a specific historic Jupiter-8 character, audition carefully. Also, while Cherry Audio tends to keep CPU usage reasonable, stacking multiple instances with maximum polyphony and heavy effects will use more resources — as is true for any modern plugin. The prudent move: try the demo, run your go-to preset types (fat pad, unison lead, string-like choir) and bounce those into your typical mix to hear how Mercury-8 behaves in context.
Final verdict and why $69 changes the conversation
At $69, Cherry Audio’s Mercury-8 is disruptive because it removes a major barrier to entry: price. It’s not just cheap for the sake of being cheap — it packages a convincing Jupiter-8 experience, modern features and broad usability into an accessible instrument. For many producers, the question will no longer be “Can I afford a Jupiter-8 emulation?” but rather “Why buy anything else at that price?” That’s a bold statement, but given Cherry Audio’s track record, the early reviews, and the feature set, Mercury-8 looks like a practical, creative, and affordable route to iconic polysynth sounds that previously required either deep pockets or compromise.
If you’re a synth nerd, the Mercury-8 is worth a demo — and if you’re a working producer or composer who routinely reaches for 1980s analogue polysynth tones, it’s likely worth picking up while the price/launch offers last. In either case, Cherry Audio just made the Jupiter-8 sound a lot less exclusive — and that’s a win for anyone who loves big, warm, classic synth sounds.